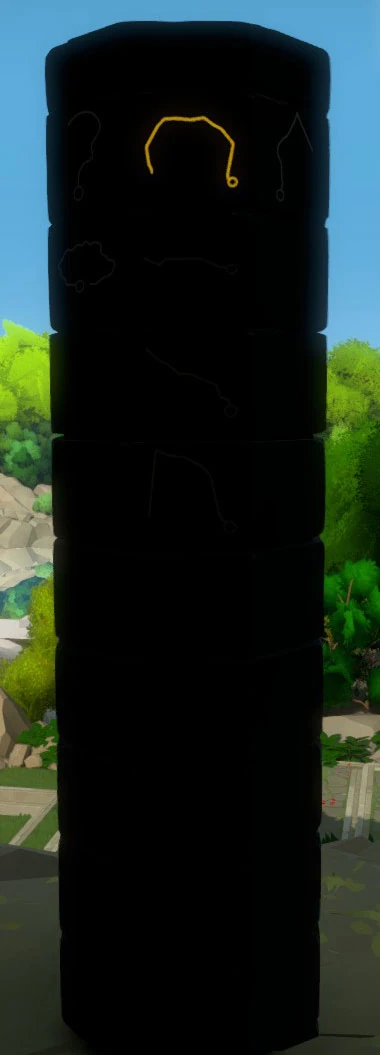
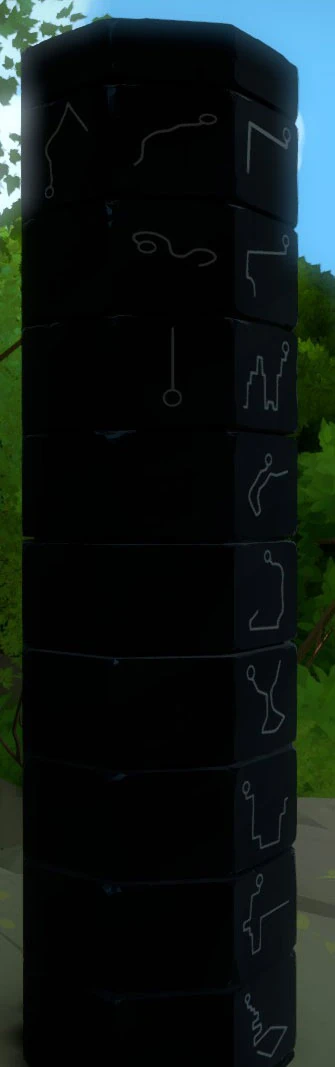
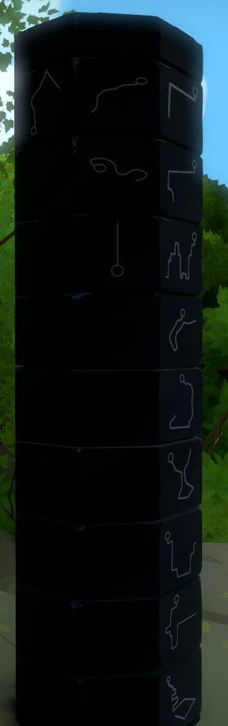
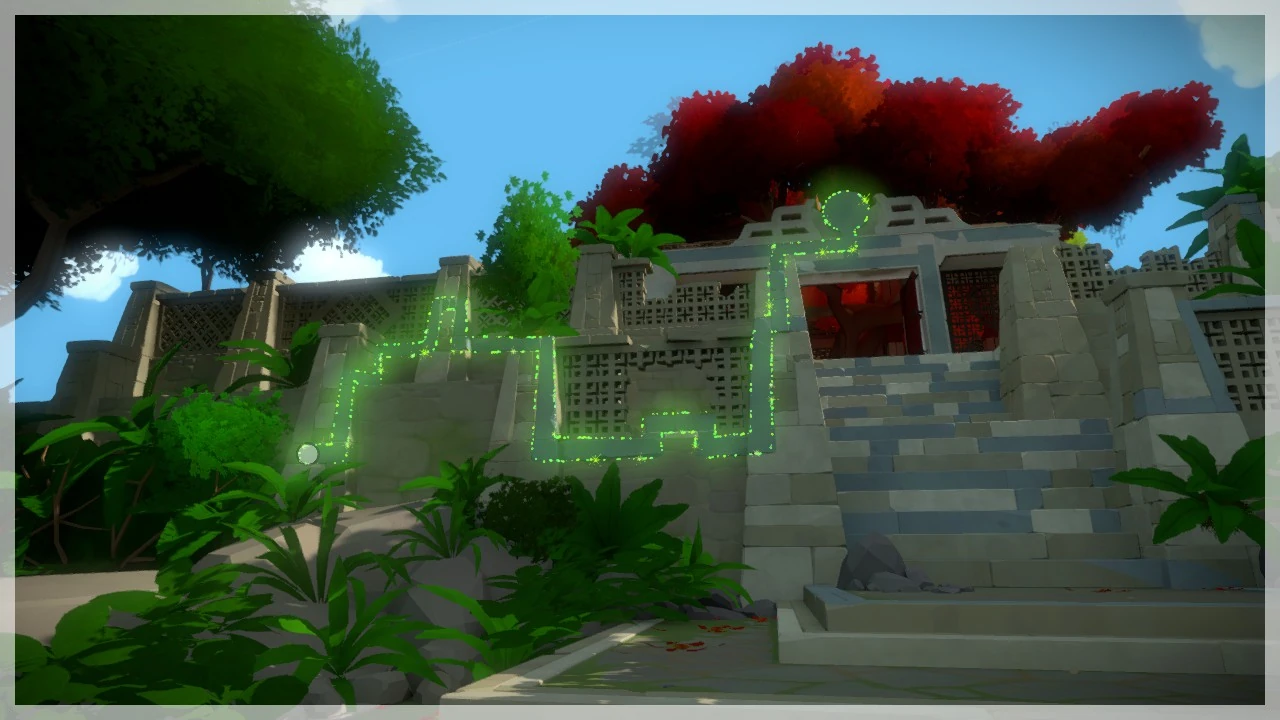
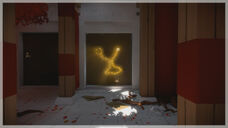
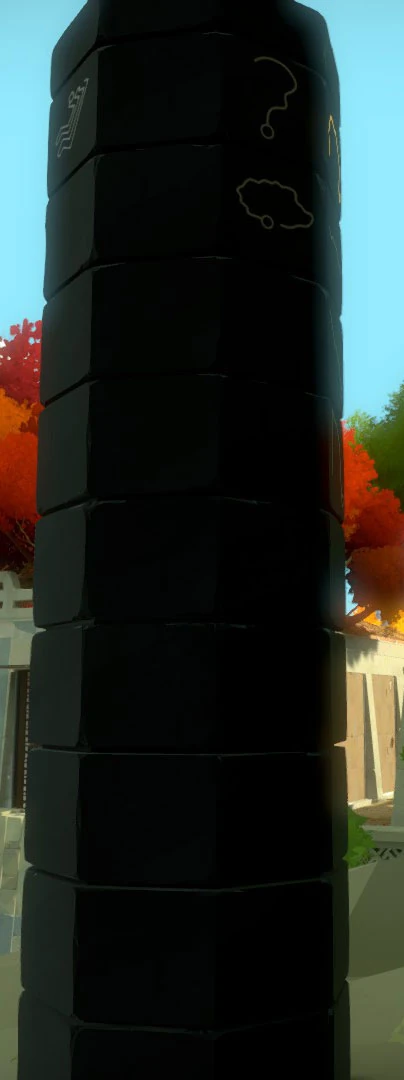
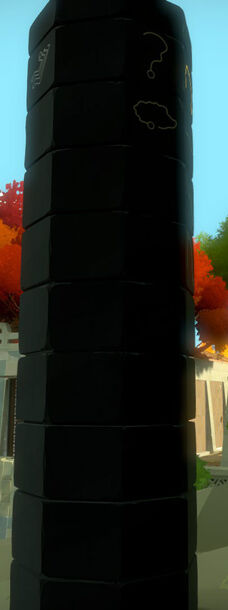
The Monastery Obelisk is one of six large black structures found on the island in The Witness. It's purpose is directly tied to that of the many hidden Environmental Puzzles, and solving any of the nearby puzzles will light up a corresponding symbol, and reveal the symbols of other nearby puzzles.
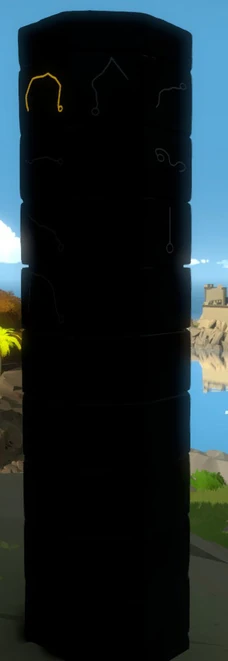
Each face of the obelisk represents an area full of puzzles. The number of symbols in a column represent the number of puzzles in a given area, and the direction of the column indicates where the puzzles can be found.
Use the following section to locate where the puzzles are located, and the images to reveal the puzzle location itself.
Monastery Obelisk - Side 1[ | ]
| # of Symbols | Symbol Locations | |
 |
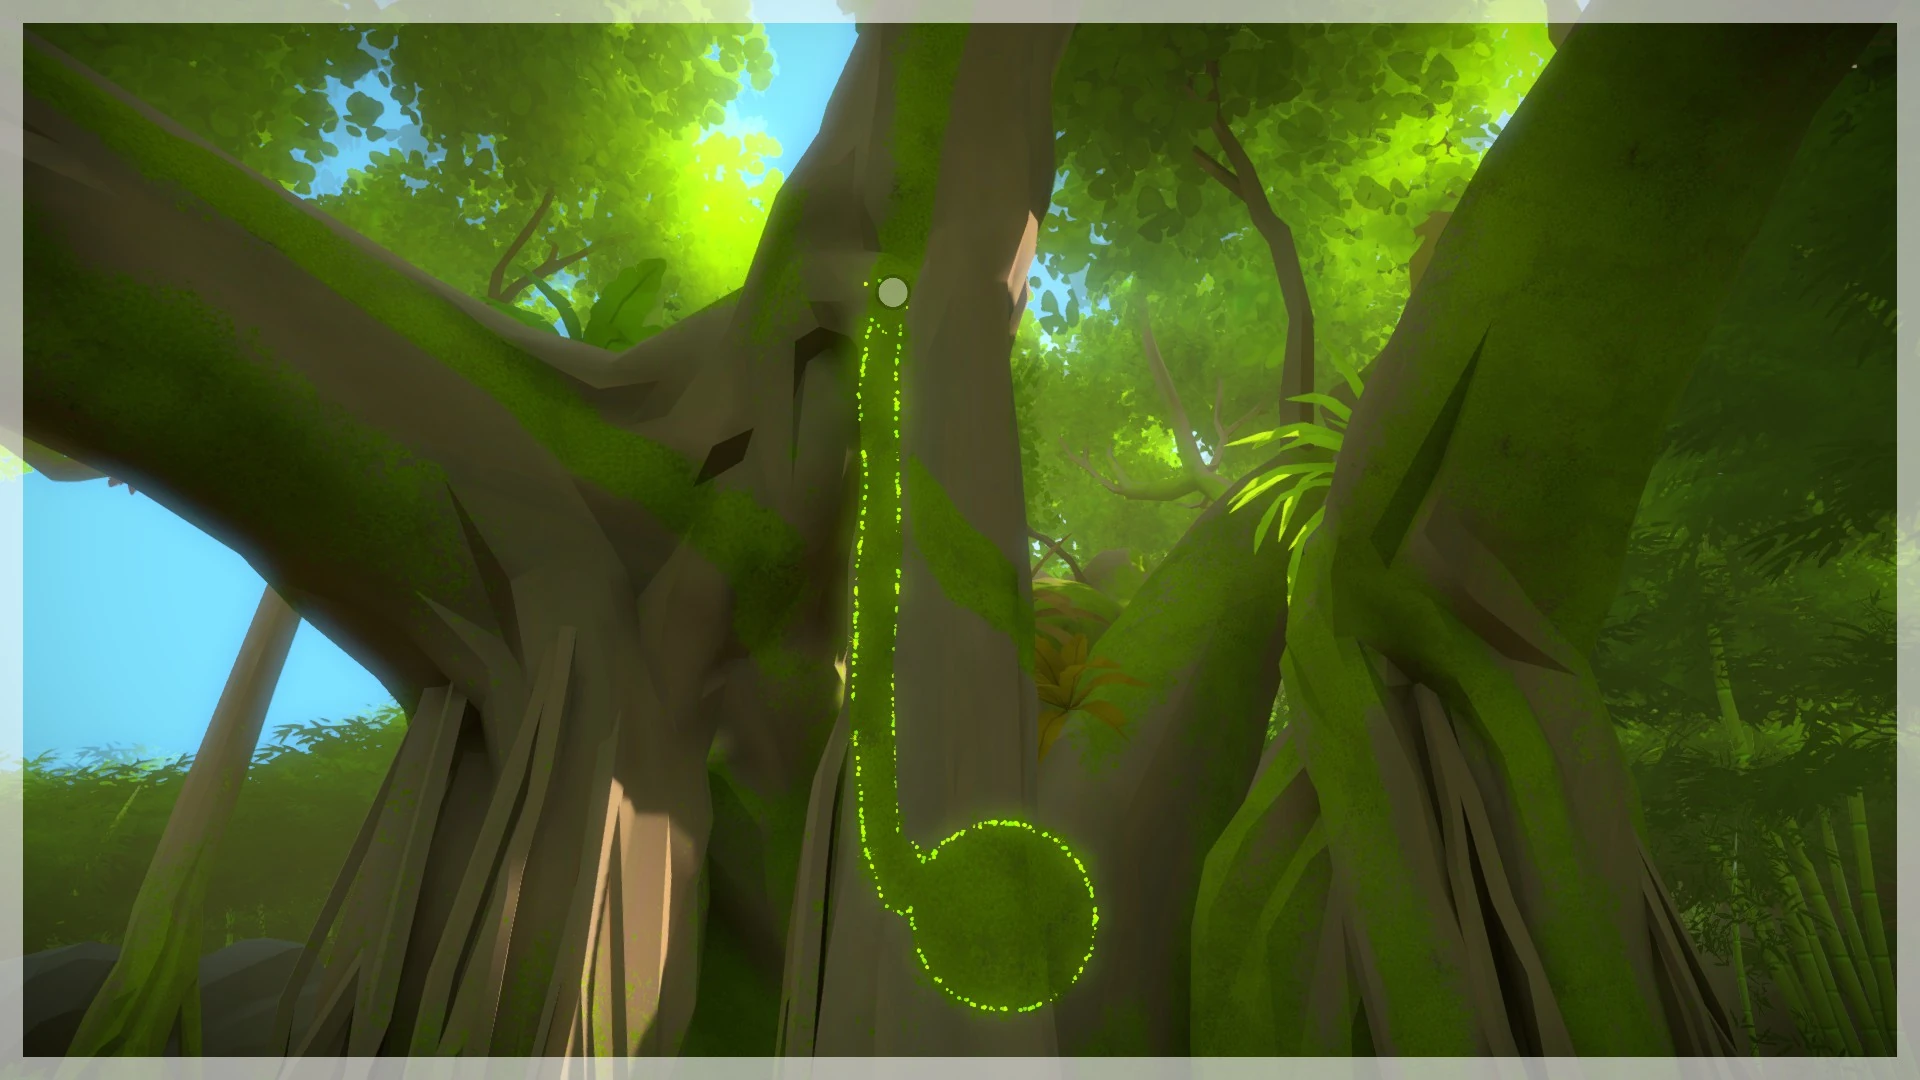
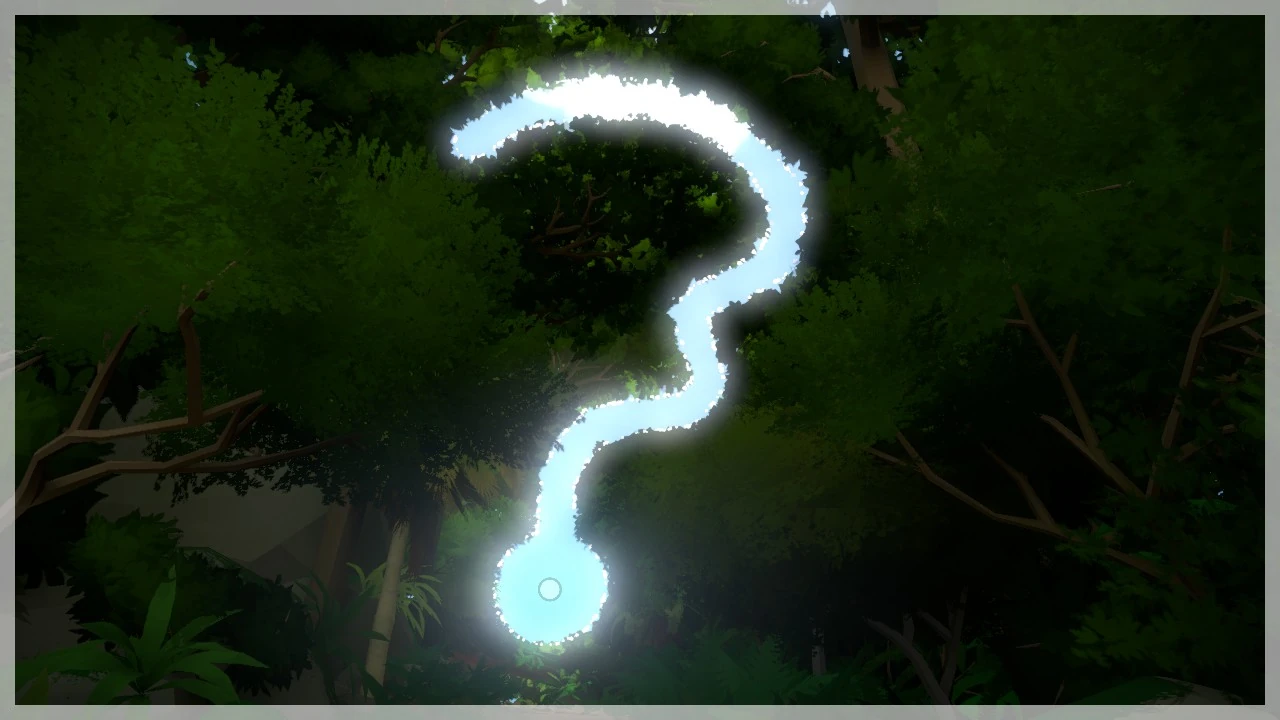
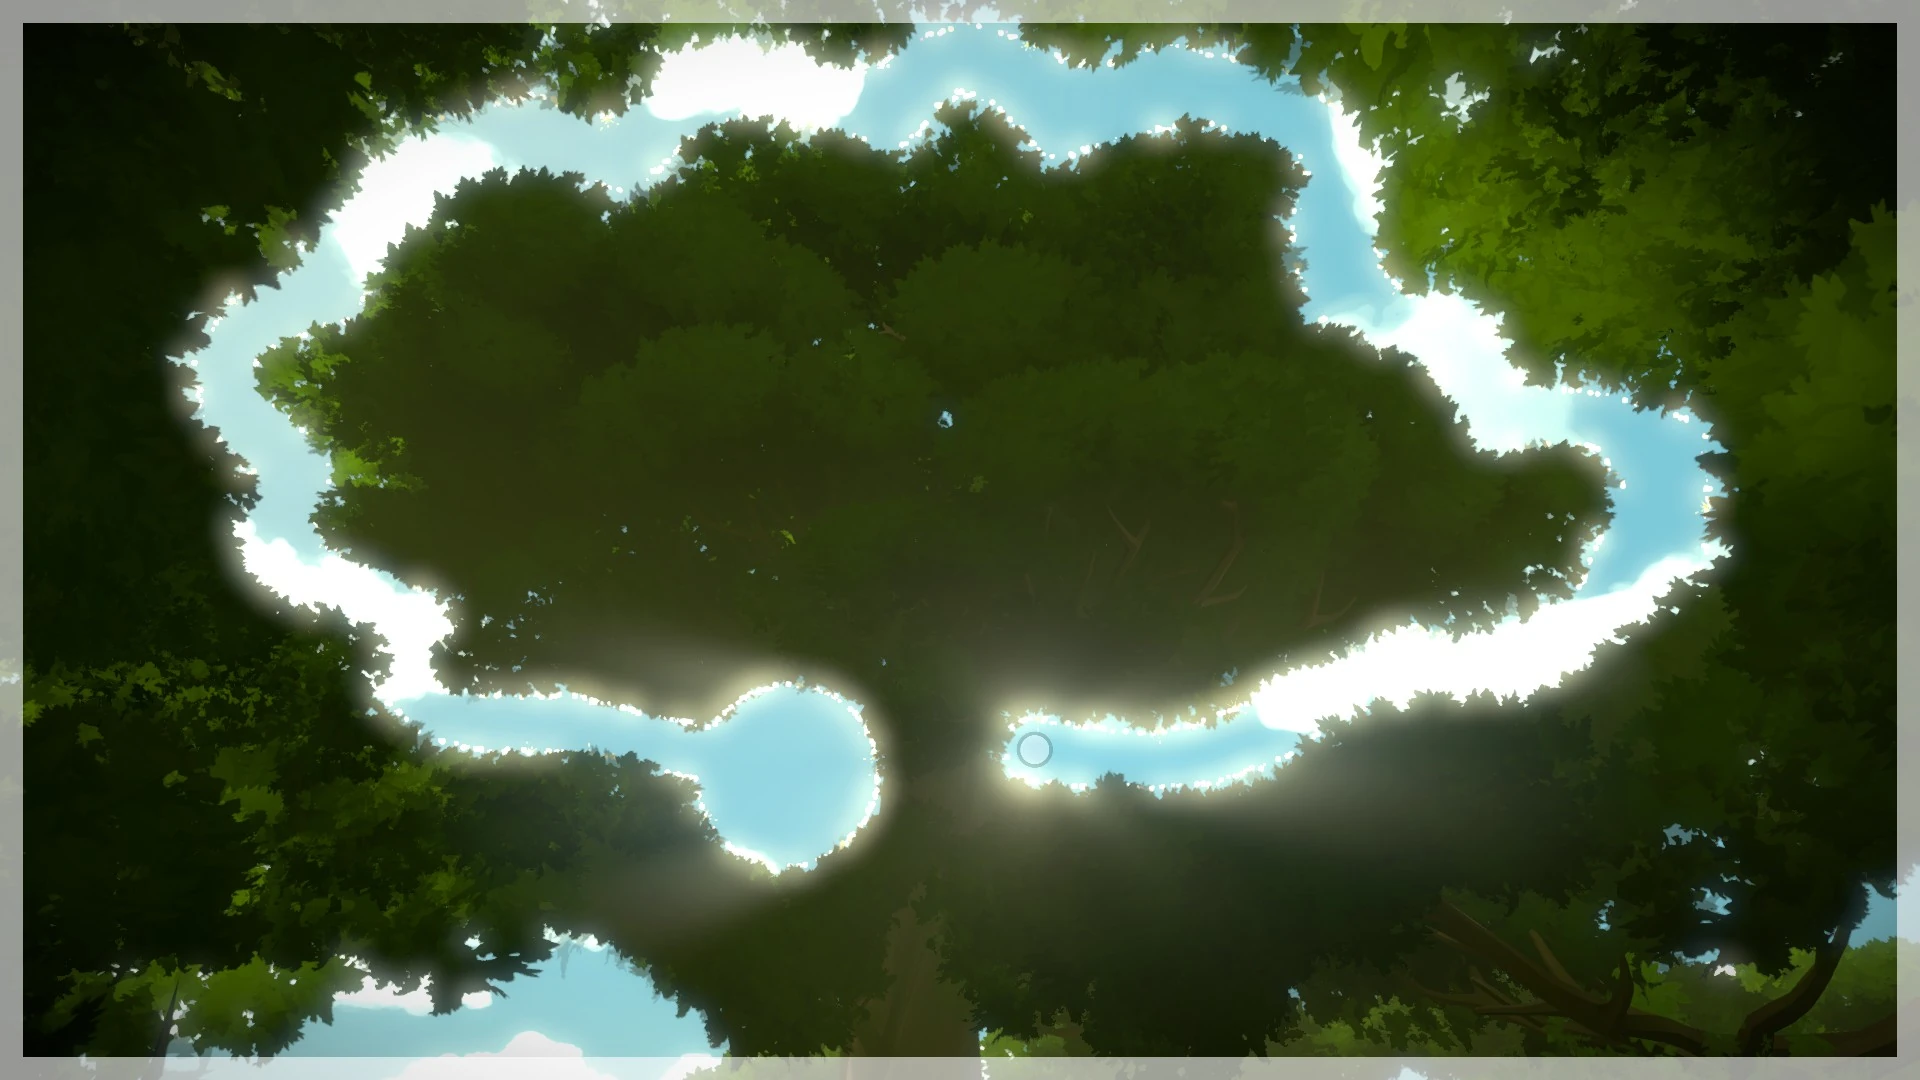
4 | Jungle - Grove |
Symbol 1[ | ]
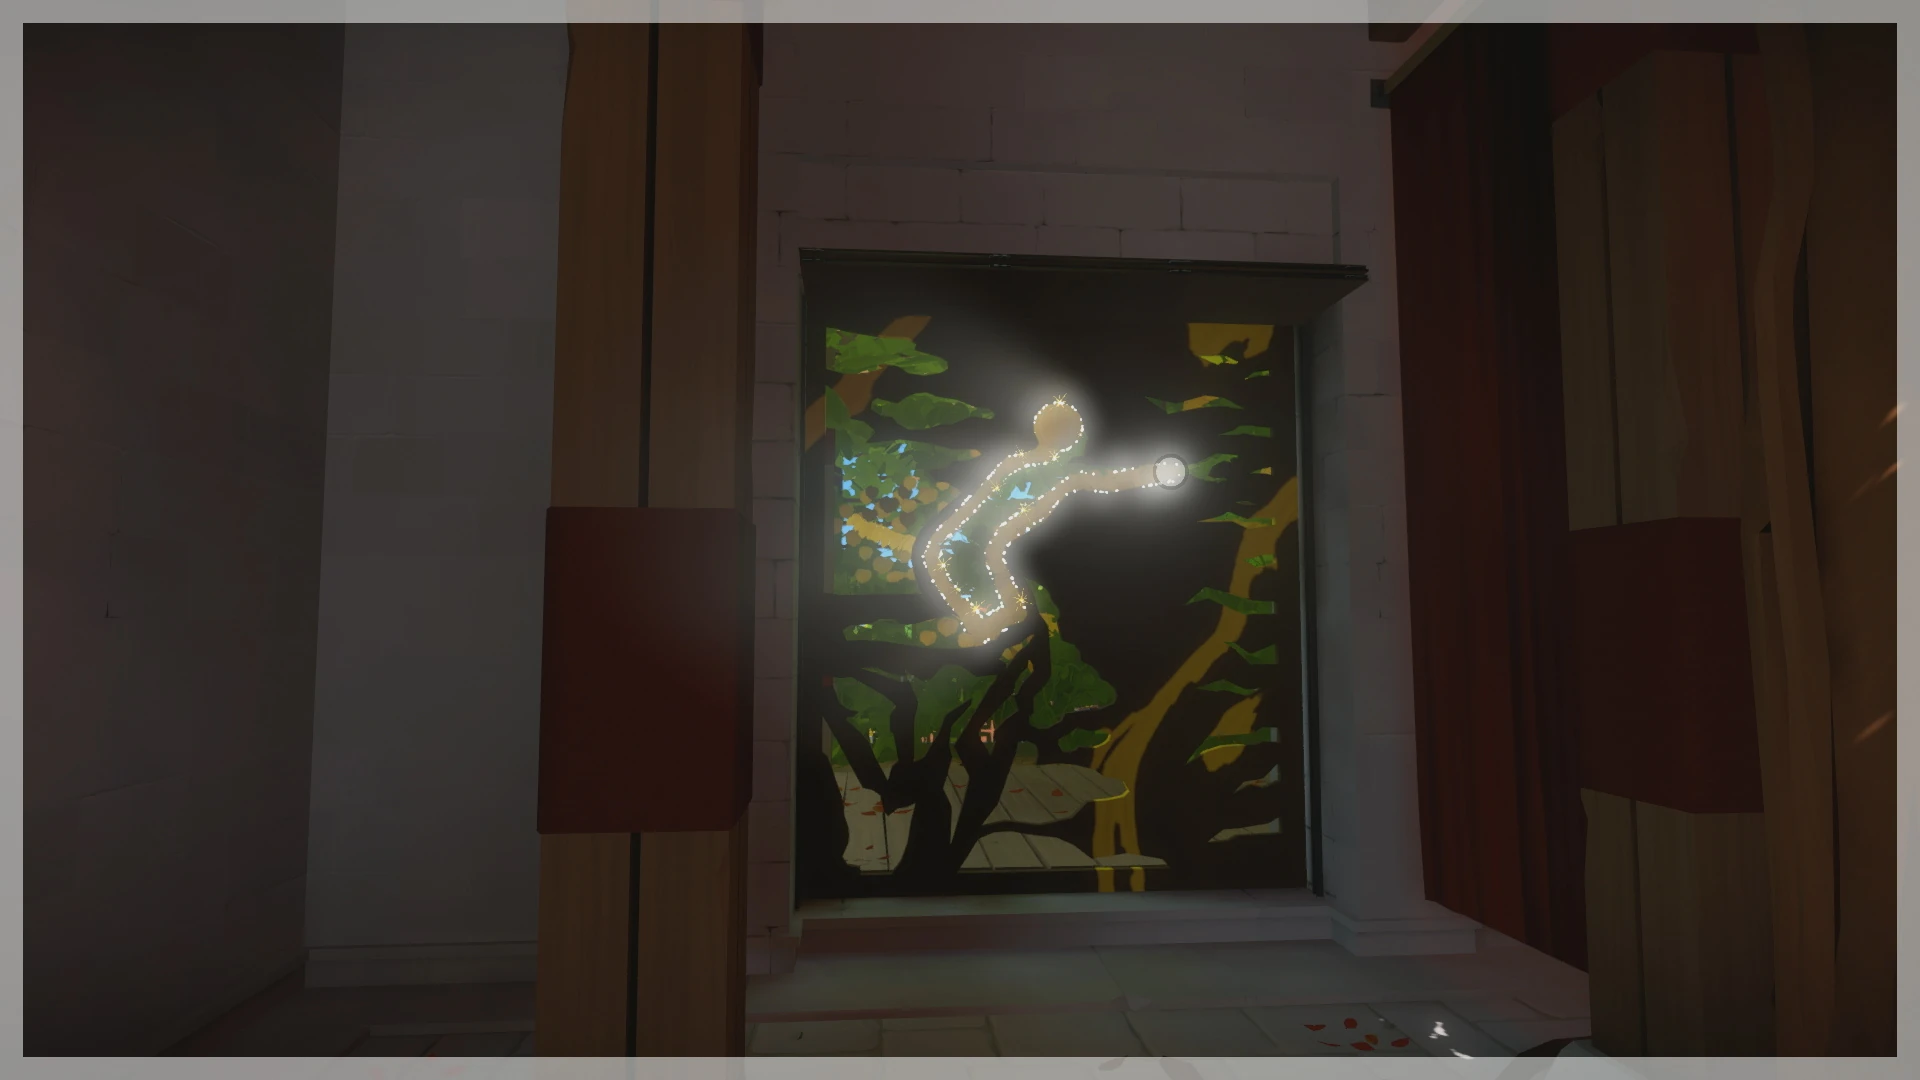
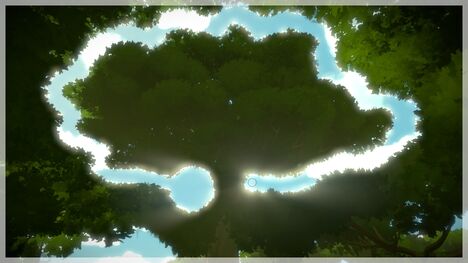
On the path leading away from the obelisk and into the jungle, you'll come across some very tall trees with long branches and moss. Look around at the center tree to find a large patch of moss, and match it up with another tree behind to start your tracing point. From there, go up and above you, taking the left branch all the way back down behind you into a root pit.
Symbol 2[ | ]

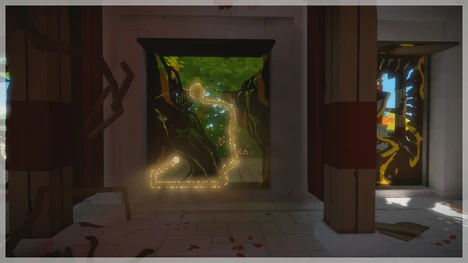
From the same grove of trees, step back just a bit and realign the starting point on the right with another path on left that travels almost horizontally to the left.
Symbol 3[ | ]

Head to the opposite side of the tree grove to find another starting point by combining on the central trees with one in front of it, and trace a path up and to the left.
Symbol 4[ | ]
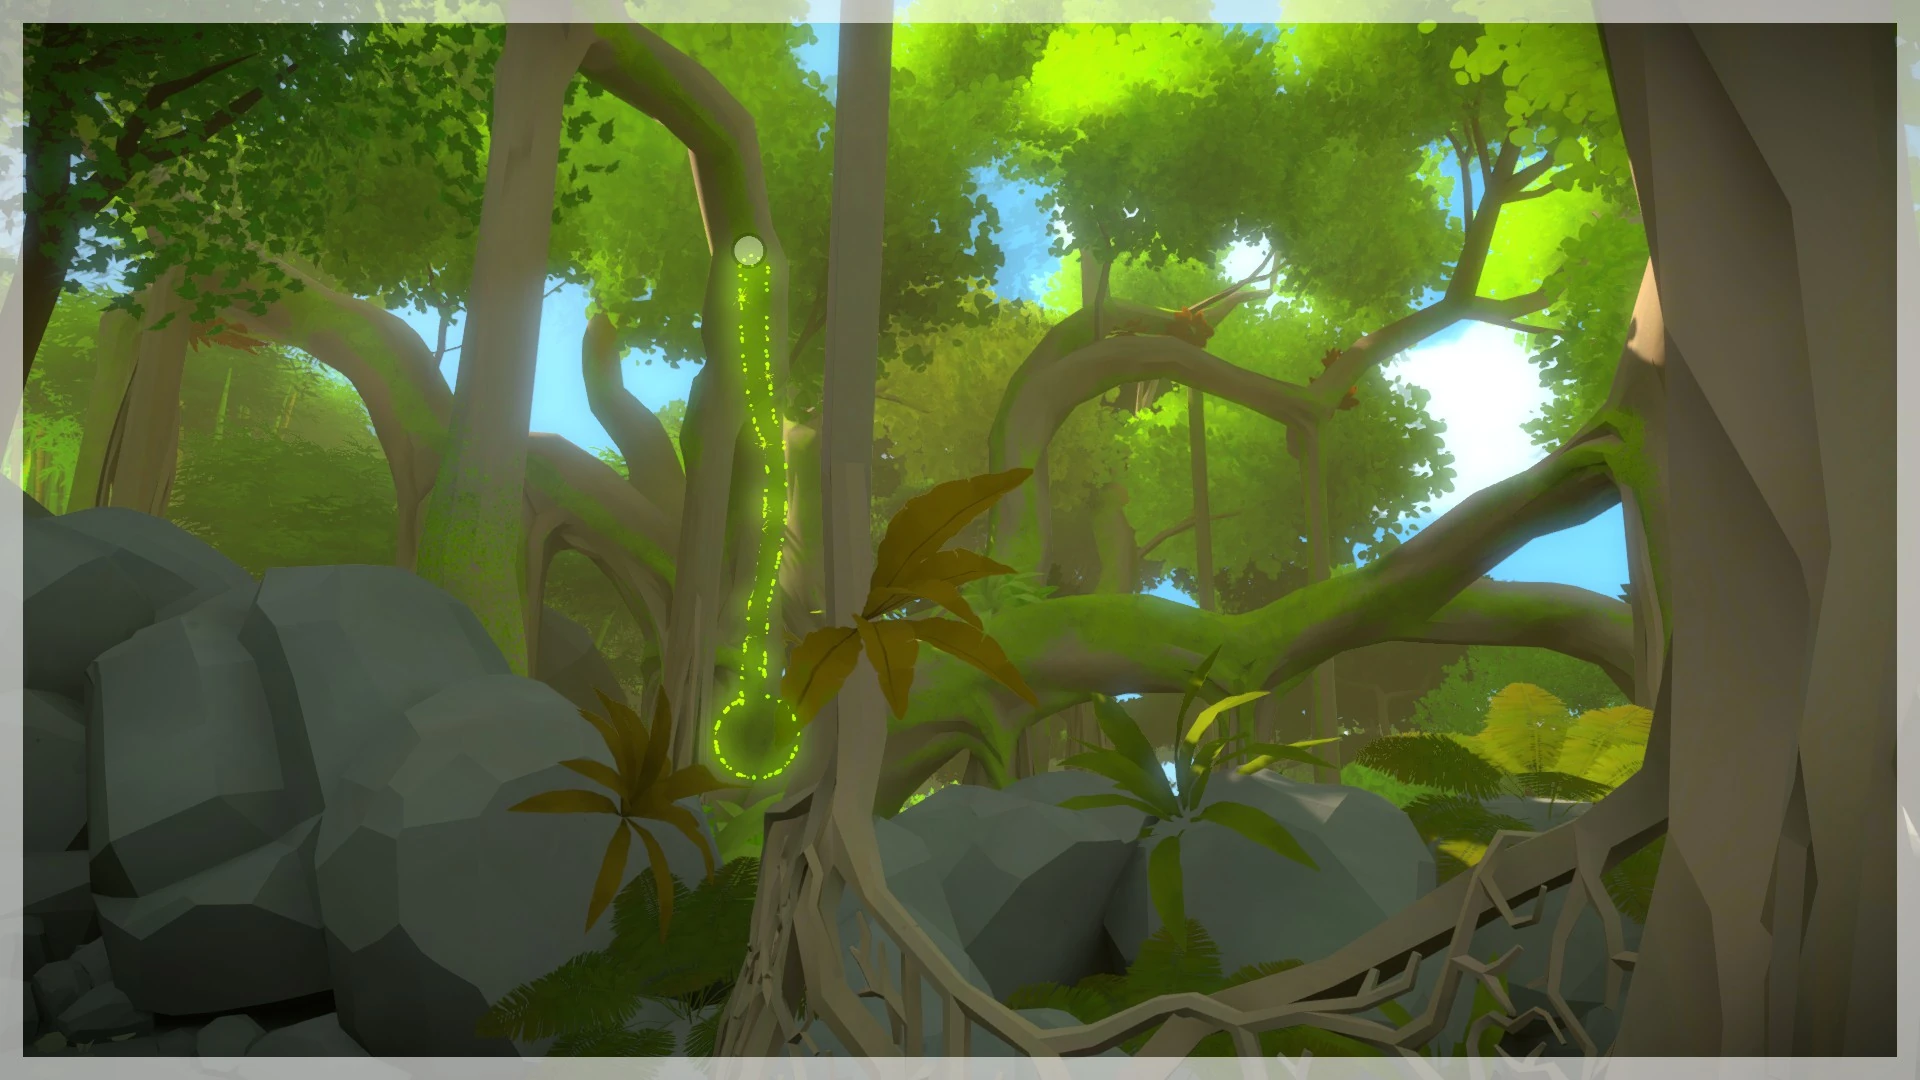
For the last symbol, head back to the other side and step out onto a rock plateau with a tree, and look for part of a circle you can line up with the central tree grove, and trace the path up the tree in-front of you and down a tree trunk to the left.
Monastery Obelisk - Side 2[ | ]
| # of Symbols | Symbol Locations | |
  |
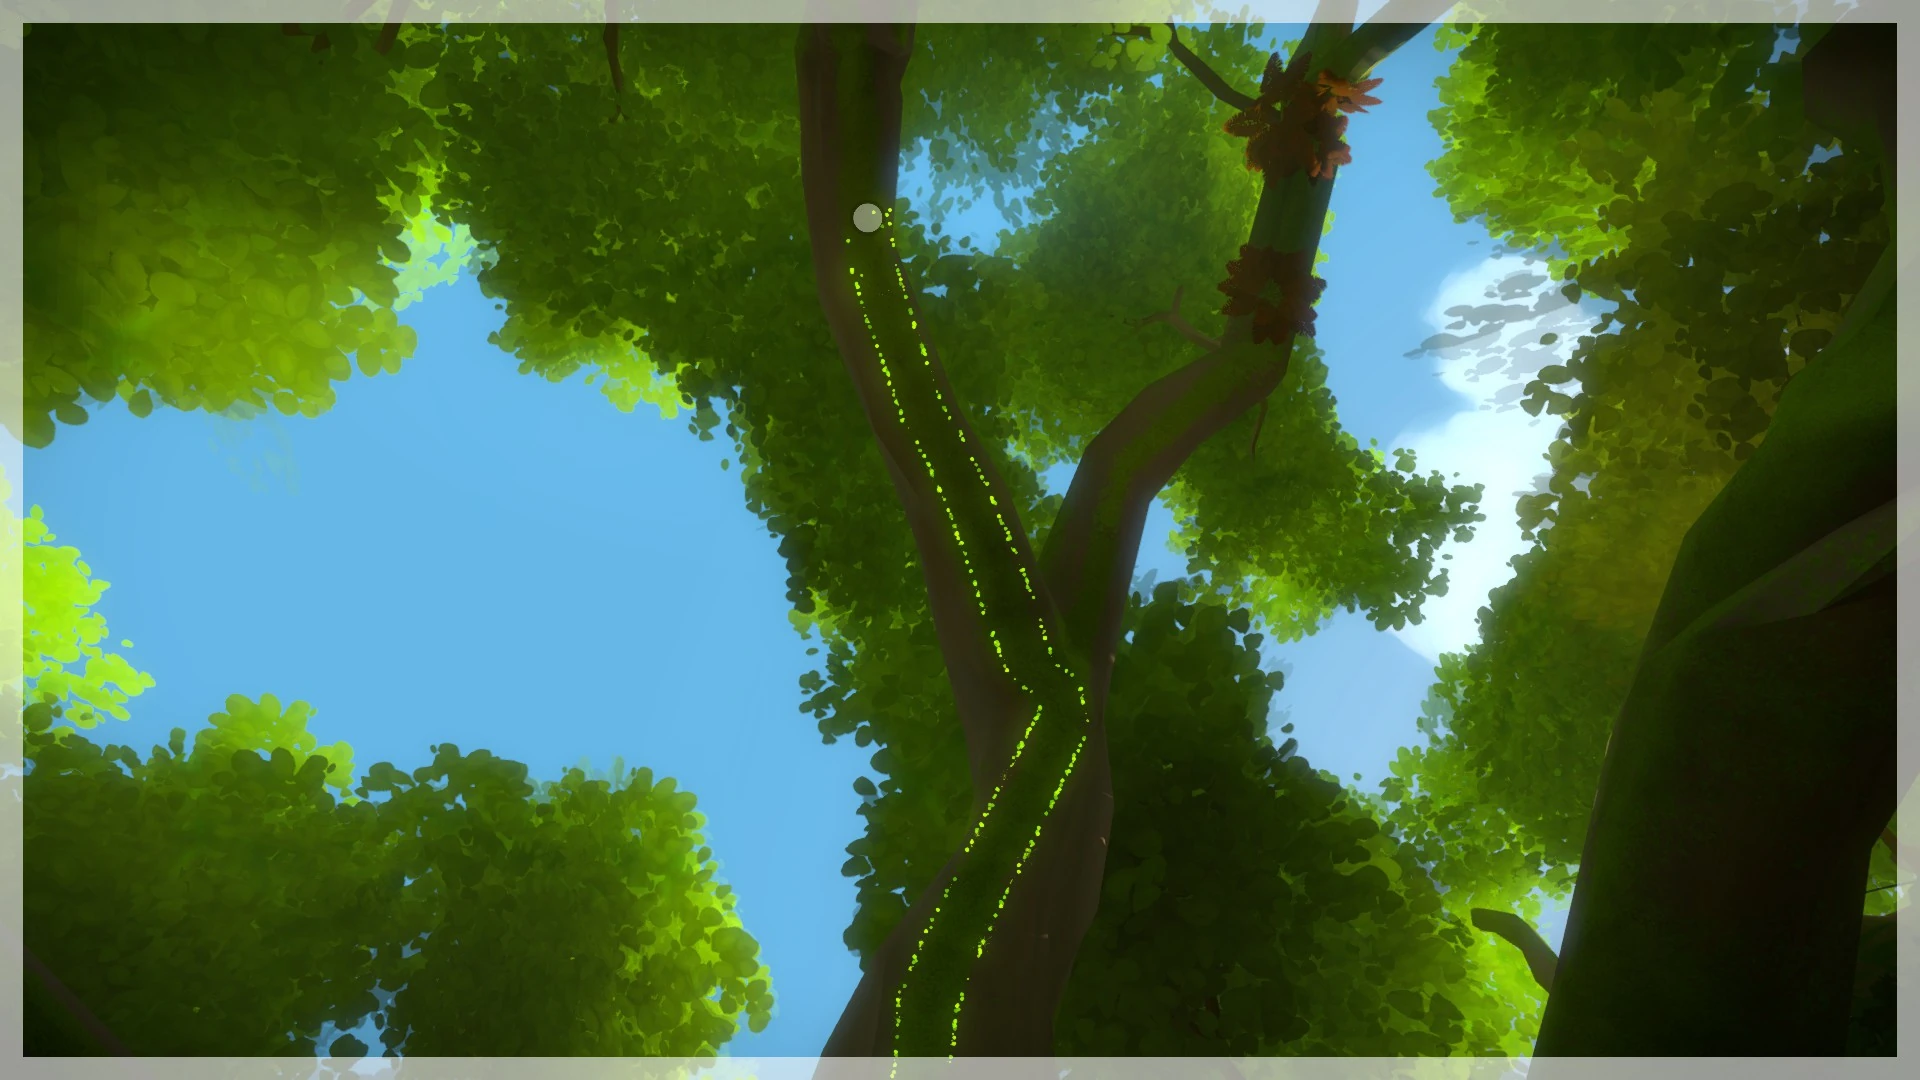
1 | Jungle - Monastery Overlook |
Symbol 1[ | ]
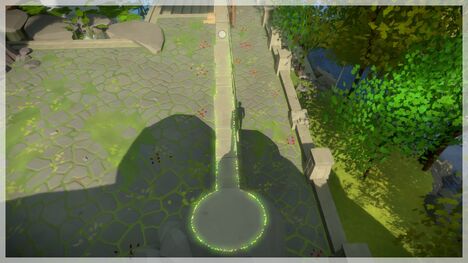
Head up into the jungle with the long branches and roots near the Monastery and look for a plateau of rocks overlooking the Zen garden, look just to the left of a series of tangling roots to see a patch of moss forming a circle when aligned with a closer tree, and trace the path through the branches down onto the trunk of a nearby tree.
Monastery Obelisk - Side 3[ | ]
| # of Symbols | Symbol Locations | |
  |
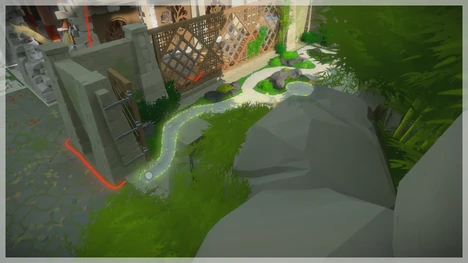
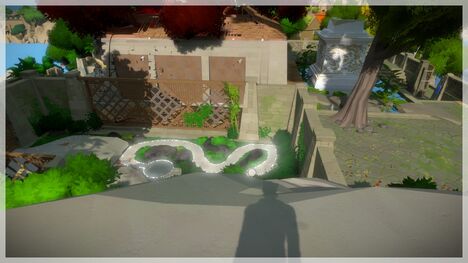
3 | Monastery - Zen Garden |
Symbol 1[ | ]

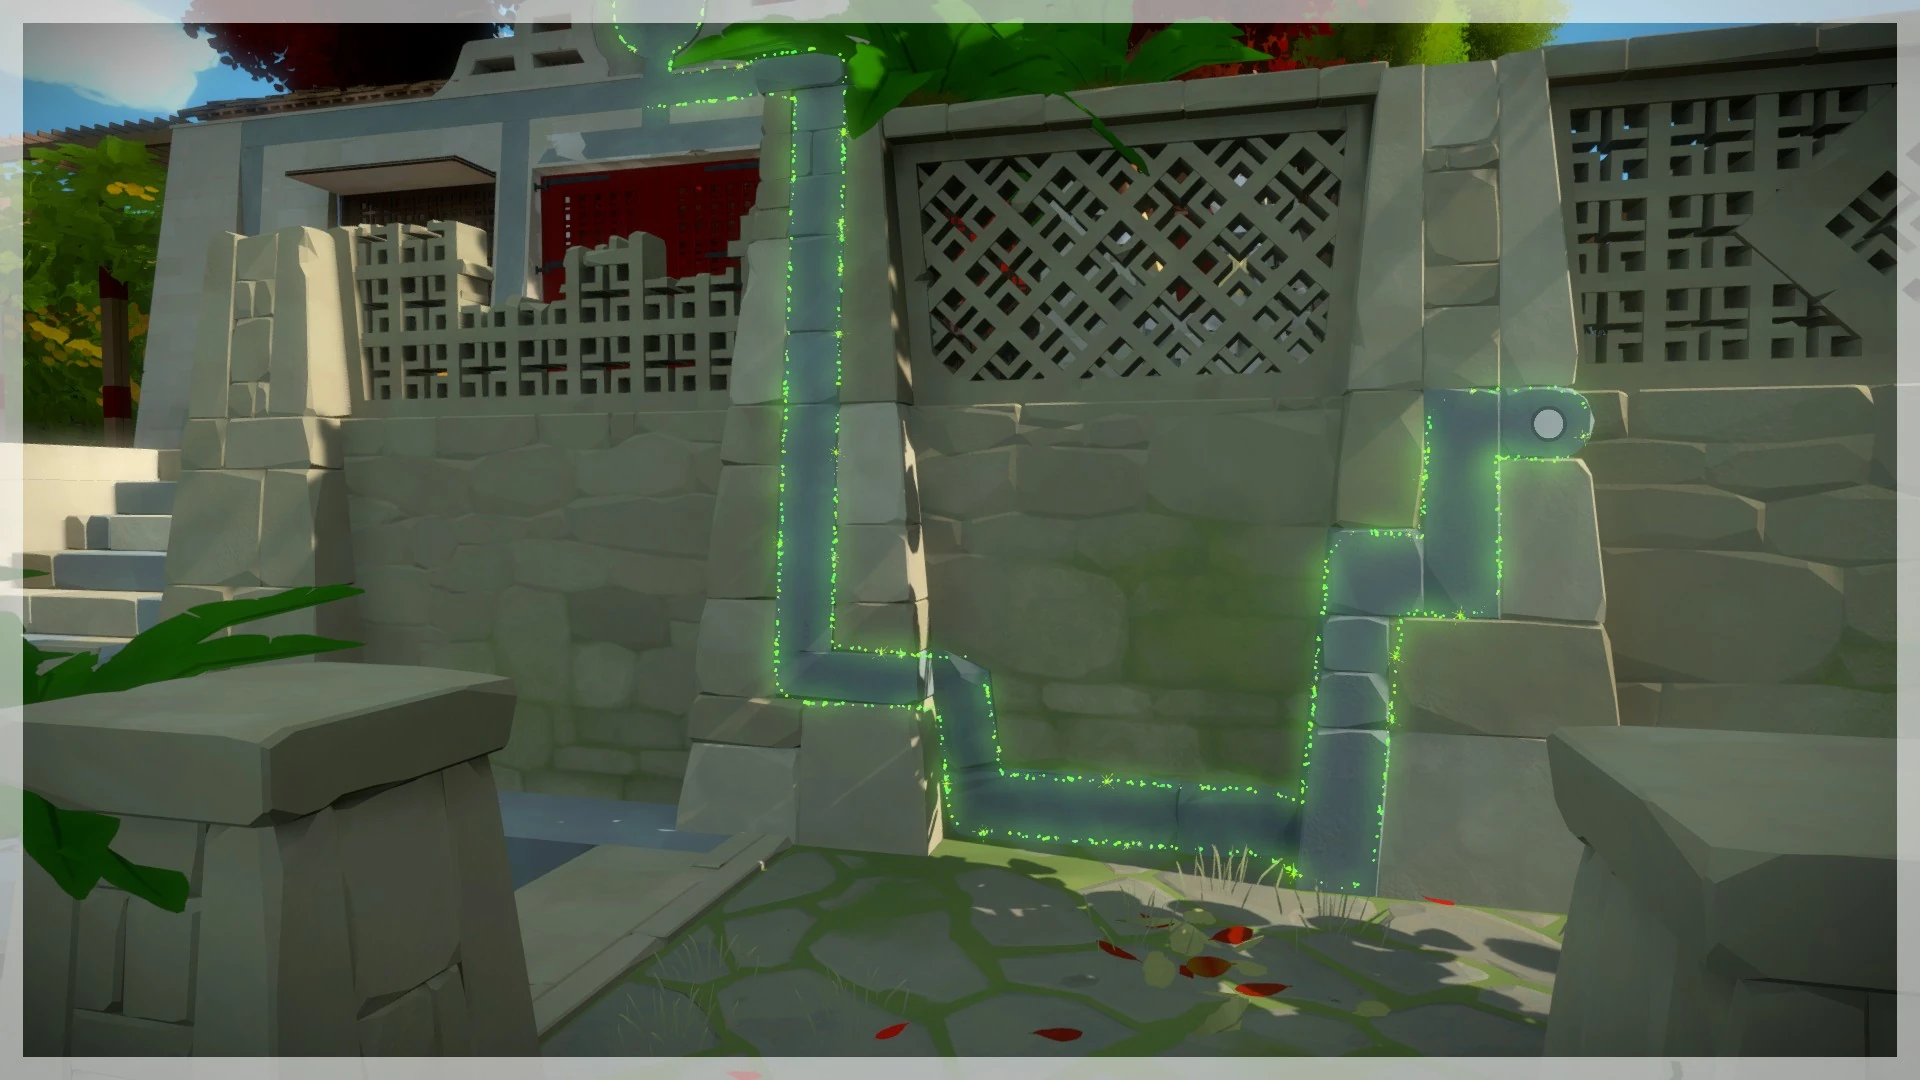
For these next series of puzzles, you'll have to find vantage points overlooking the Zen Garden next to the Monastery. For the first symbol, you'll actually have to open the gate to the garden by solving the puzzles along the wall. Once open, travel just to the side of the obelisk itself to find a spot to look down where part of a rock has circle indentation you can use to line up the path.
Symbol 2[ | ]

Head around the Monastery through the jungle towards the river on the other side, and make a left before you hit the river to walk out over the rocks to look down into the Zen garden. Position yourself so that the rocks you are standing on contrast with the stone blocks below to form a puzzle you can trace.
Symbol 3[ | ]

Go right from the previous symbol to overlook the back plaza of the Monastery, and align yourself above the guard rails to form a complete line that you can trace.
Monastery Obelisk - Side 4[ | ]
| # of Symbols | Symbol Locations | |
  |
9 | Monastery - Entrance / Stairway |
Symbol 1[ | ]

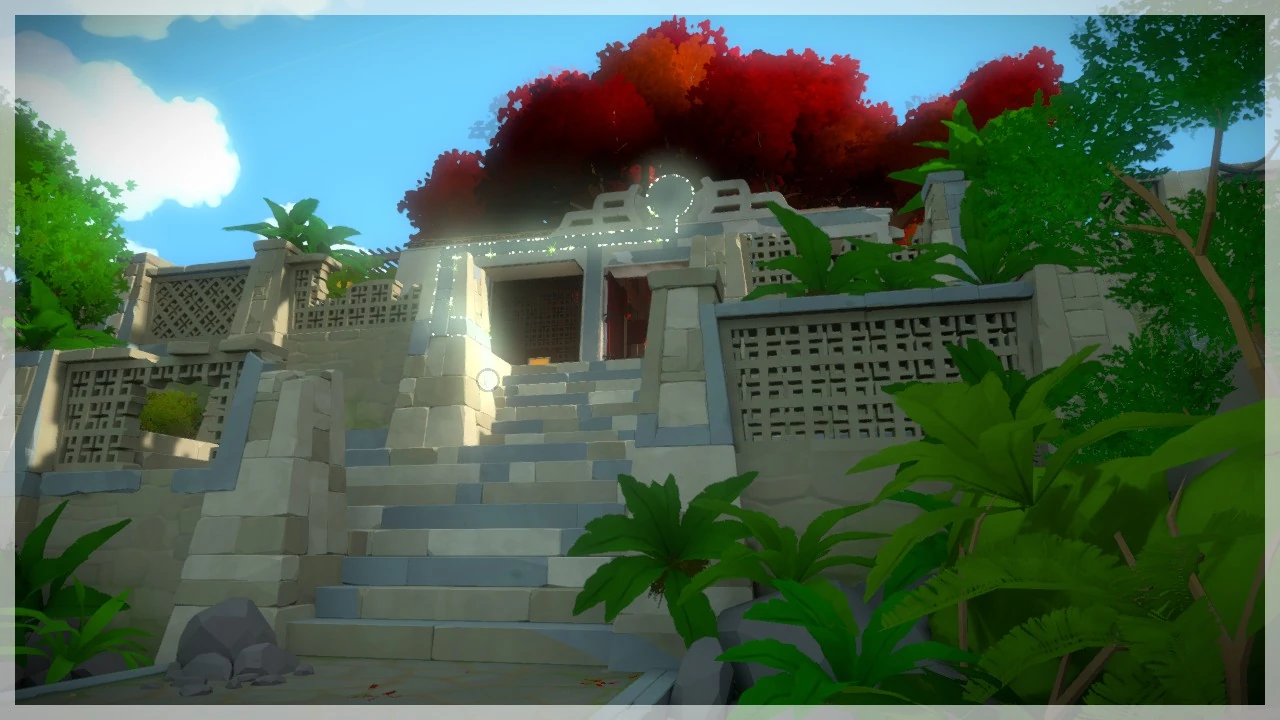
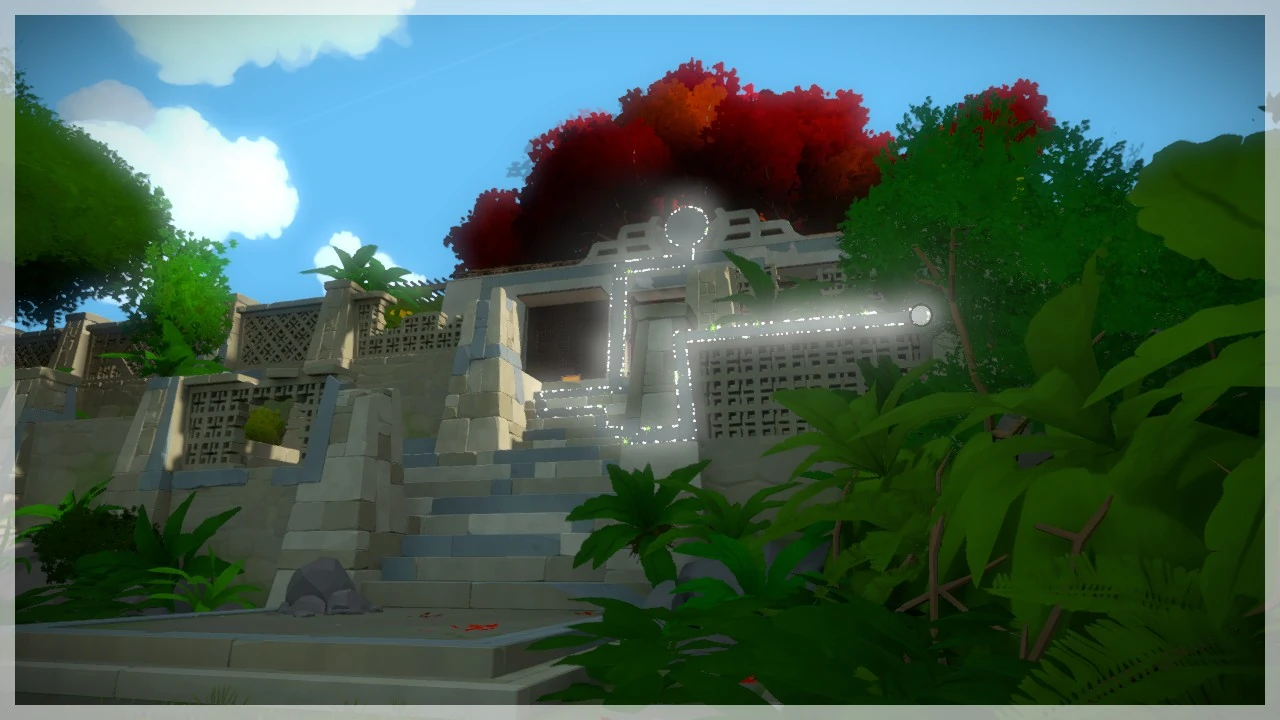
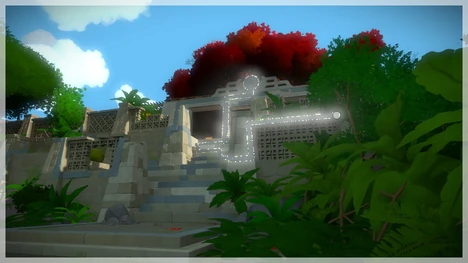
The top of the Monastery's entrance will be key for getting a lot of the symbols on this side of the obelisk. Start off by getting close: the symbol is yours by simply tracing along the side of the building.
Symbol 2[ | ]

Position yourself so that the stairs' left railing make a track with the top of the Monastery to reveal the second symbol.
Symbol 3[ | ]

Step back and to the left to line up the outermost wall with the Monastery's inner-most wall. This long track will give you your third symbol.
Symbol 4[ | ]

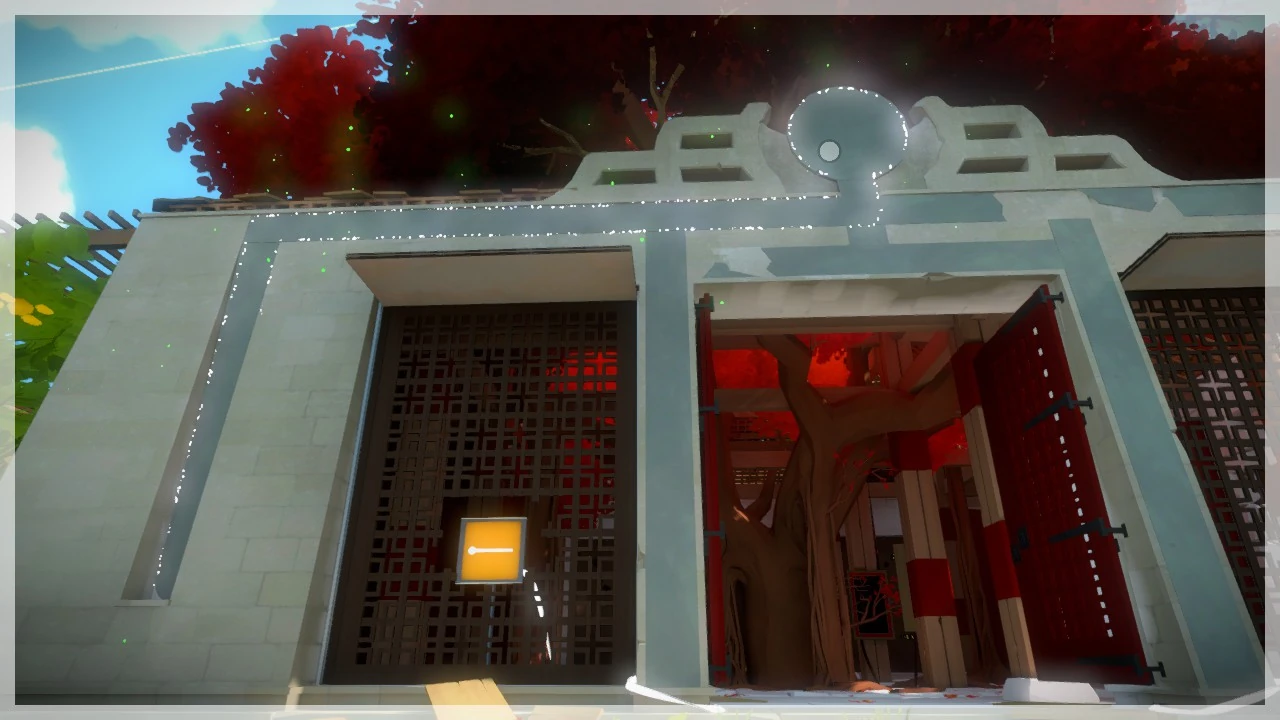
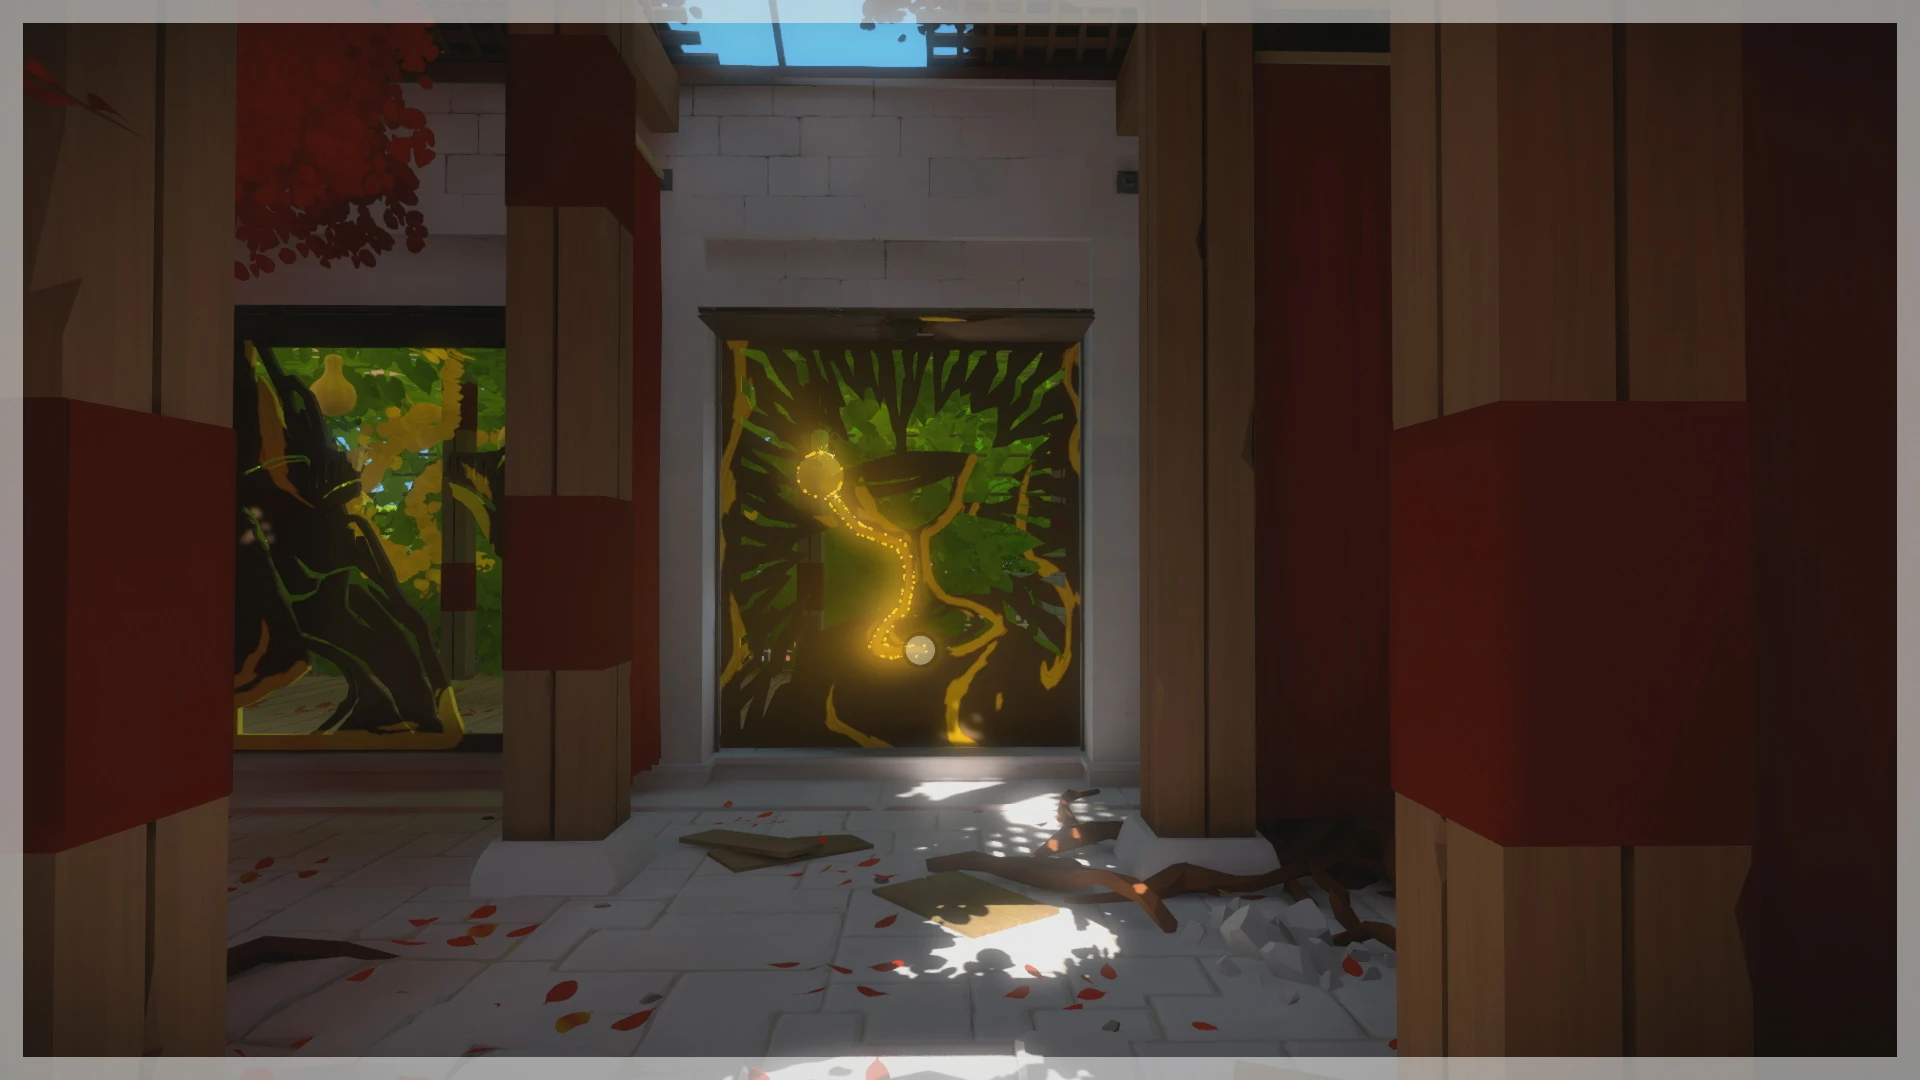
These next series of symbols can be found inside the Monastery itself. For these, you'll need to open the shutters to the left side, so make sure you manipulate the bonsai puzzle at the far end and face the wall you want to open. Once open, check the far left panel for the cutout of a man reaching, and line his head up with the fruit and trace along the flowers that follow his arm.
Symbol 5[ | ]

This next symbol blends parts of the fruit and flowers like before, with colored metal on the shutter that has been damaged. In particular, make sure you line up the discolored edge of the top metal part with the part of the fruit that's not yellow to cover it, and then trace the line down the bottom.
Symbol 6[ | ]


This last of the interior symbols is tricky, as it is also a limited opportunity. You can start the puzzle well enough by matching the fruit and tracing down the cup symbol - only to get stuck. What you need to do is redo the bonsai puzzle behind you to close the shutters, and start the puzzle as the shutters close and wait for them to fully close before continuing the path up the other side.
Symbol 7[ | ]

Go halfway up the stairs and take a right to a small path. Step back to align the right side with the monastery gate and make sure the leaf does not block your view as you trace this next puzzle.
Symbol 8[ | ]
Like Symbol 3, Symbol 8 requires you to step back. This time you're stepping to the right to make the connection from the Monastery's inner wall to the stairs and lastly to the outer right wall.
Symbol 9[ | ]
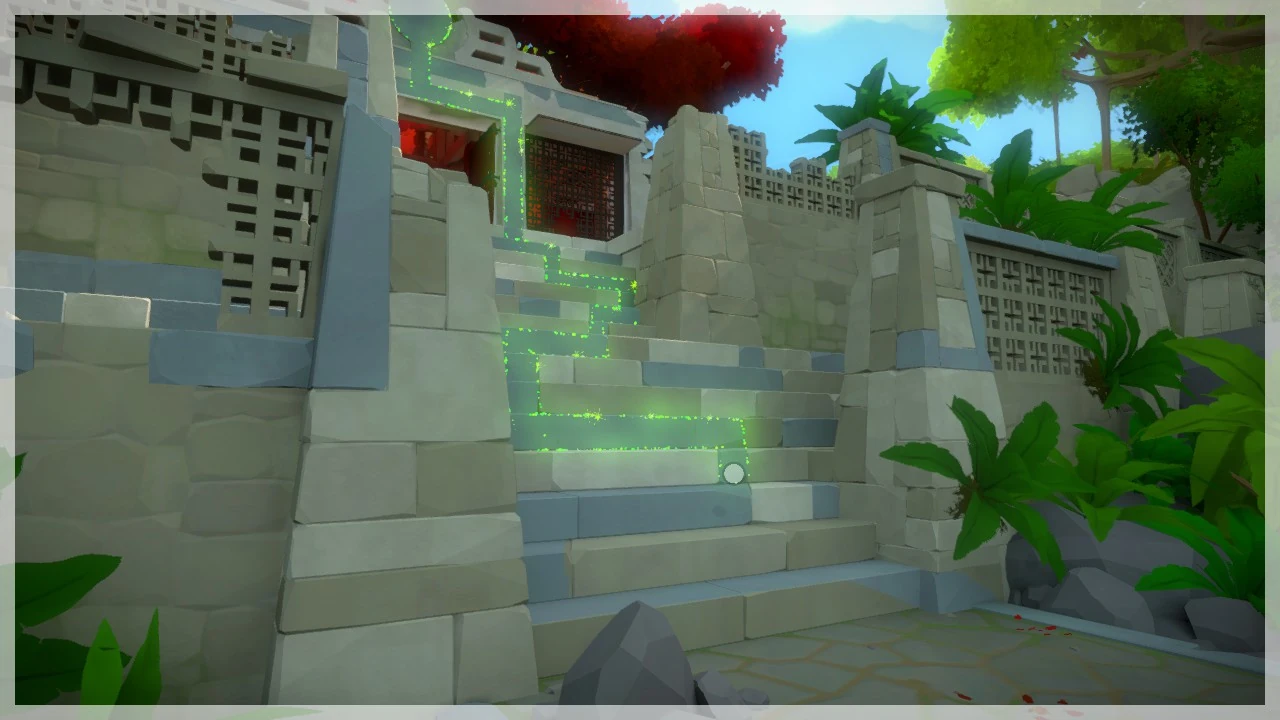
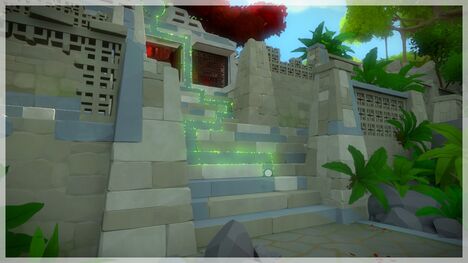
This may take a few tries, but by standing close to the bottom of the stairs and to the left a bit you can connect the top of the Monastery to the entire length of the stairs all the way down to the bottom square that makes the base of the steps.
Monastery Obelisk - Side 5[ | ]
| # of Symbols | Symbol Locations | |
  |
1 | Monastery - Front Steps |
Symbol 1[ | ]

Look out over the Monastery from the Obelisk and note the final few steps among the grass at the end. The puzzle here is not in the ruins, but the grass that separates the stones. Start from the top left to end at the top right.
Monastery Obelisk - Side 6[ | ]
| # of Symbols | Symbol Locations | |
  Monastery Obelisk Side6.jpg |
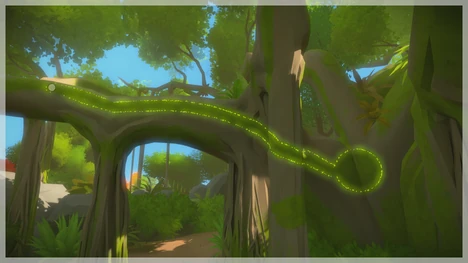
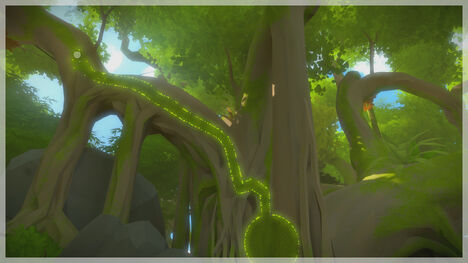
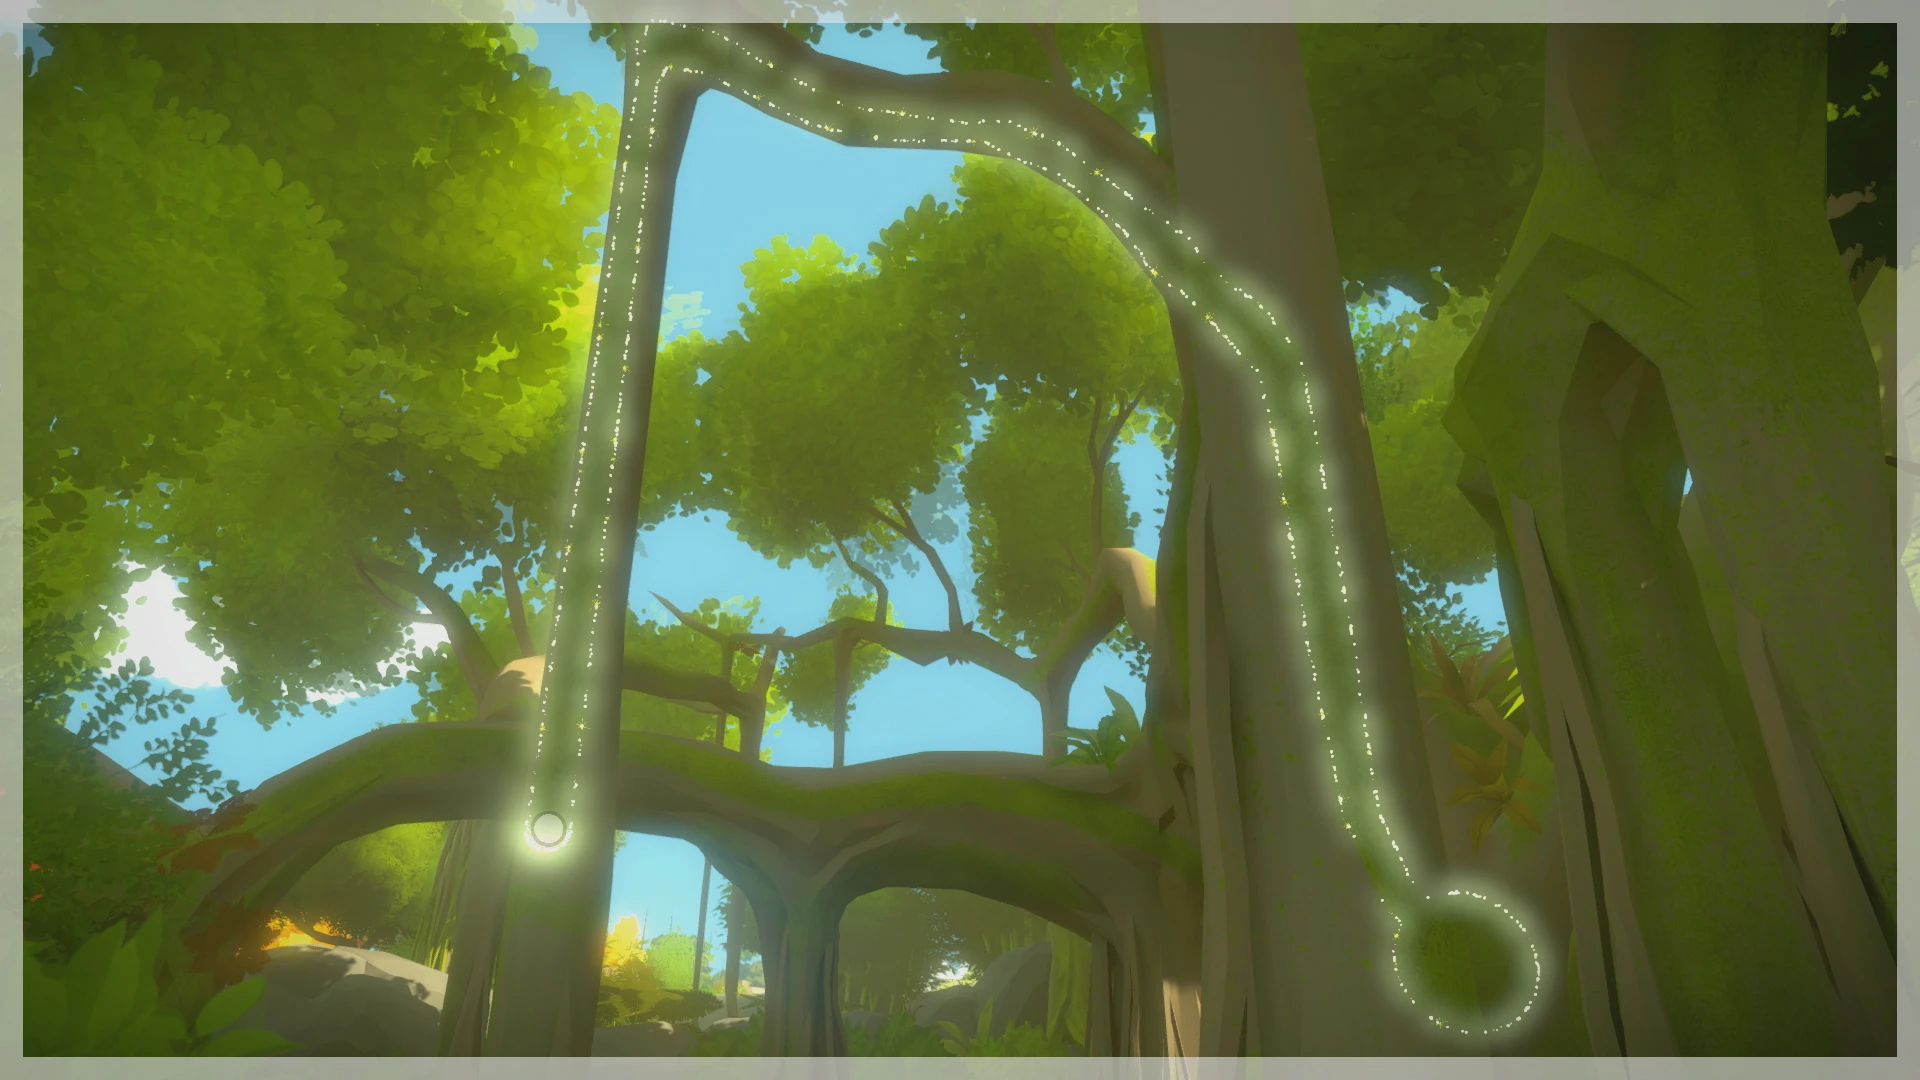
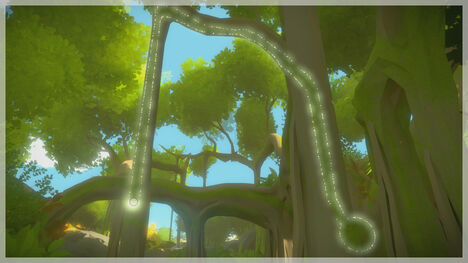
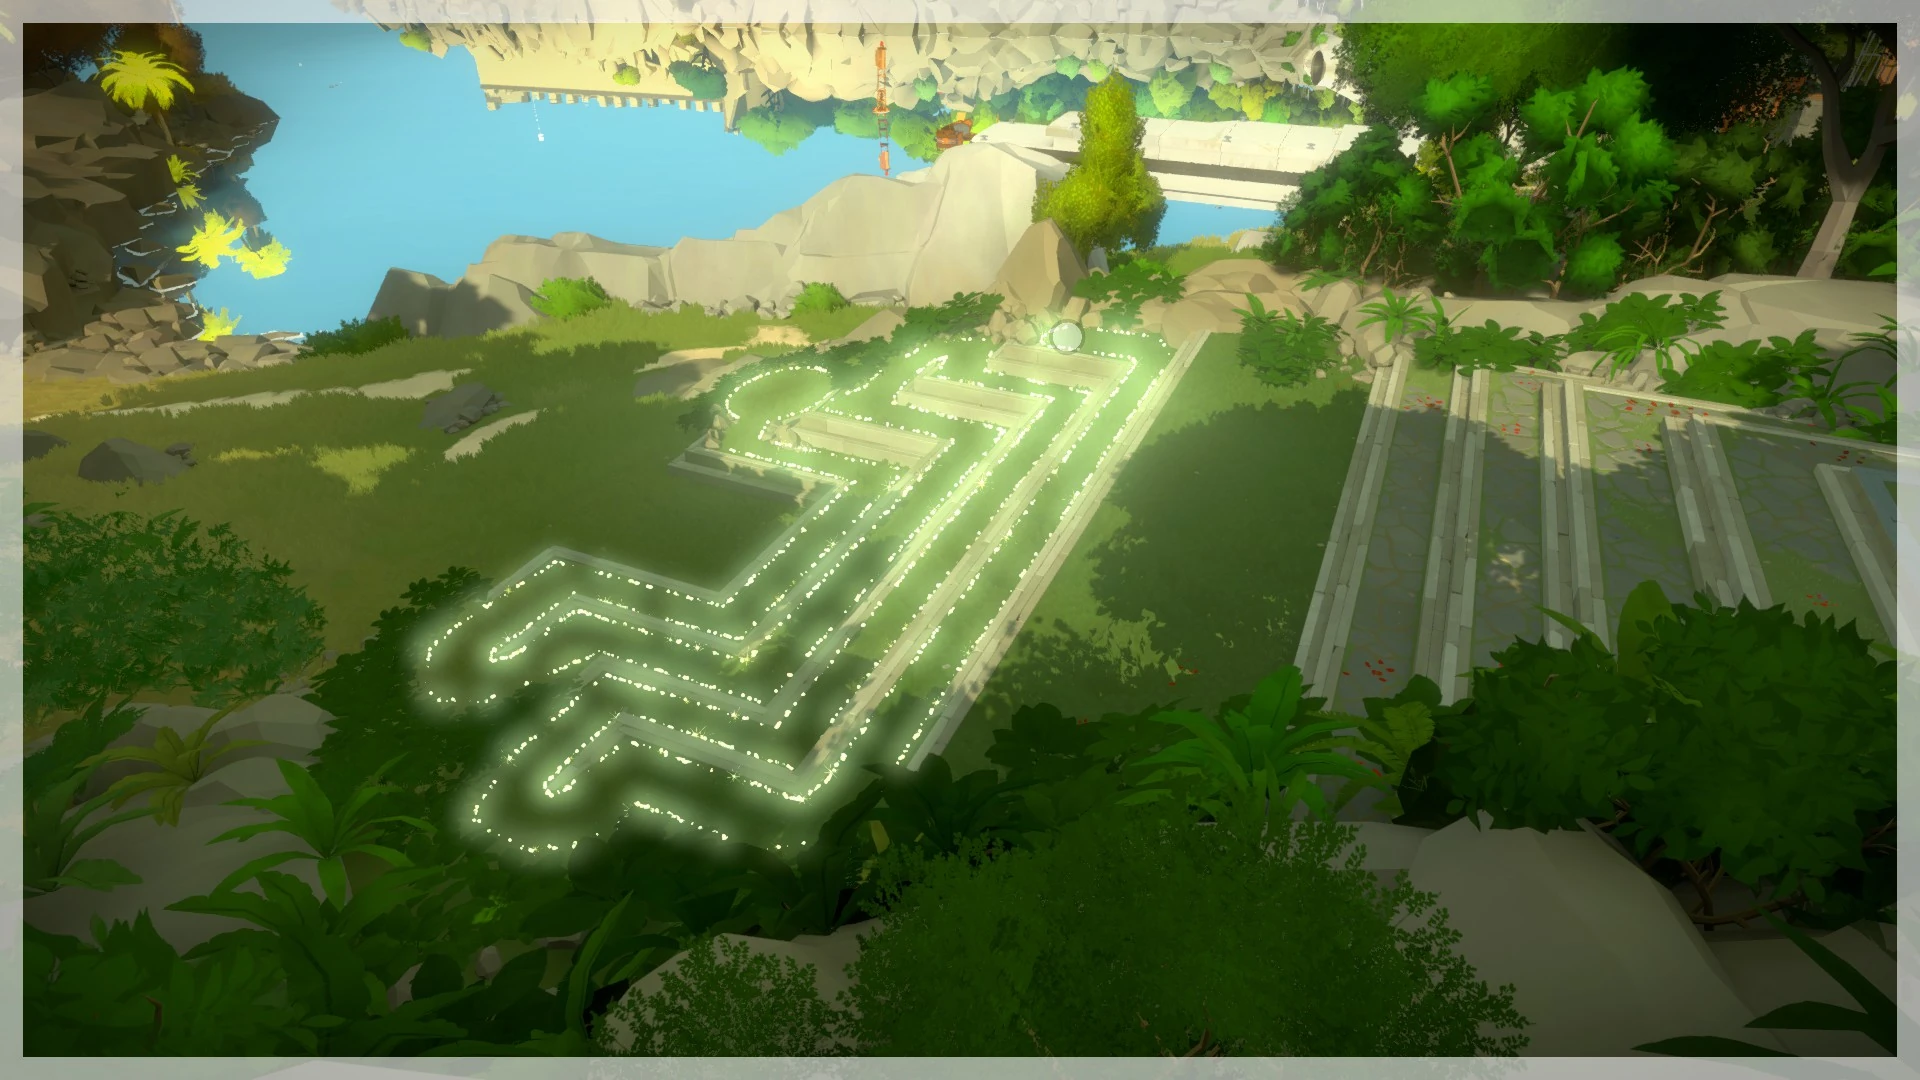
2 | Jungle - Entrance Path |
Symbol 1[ | ]

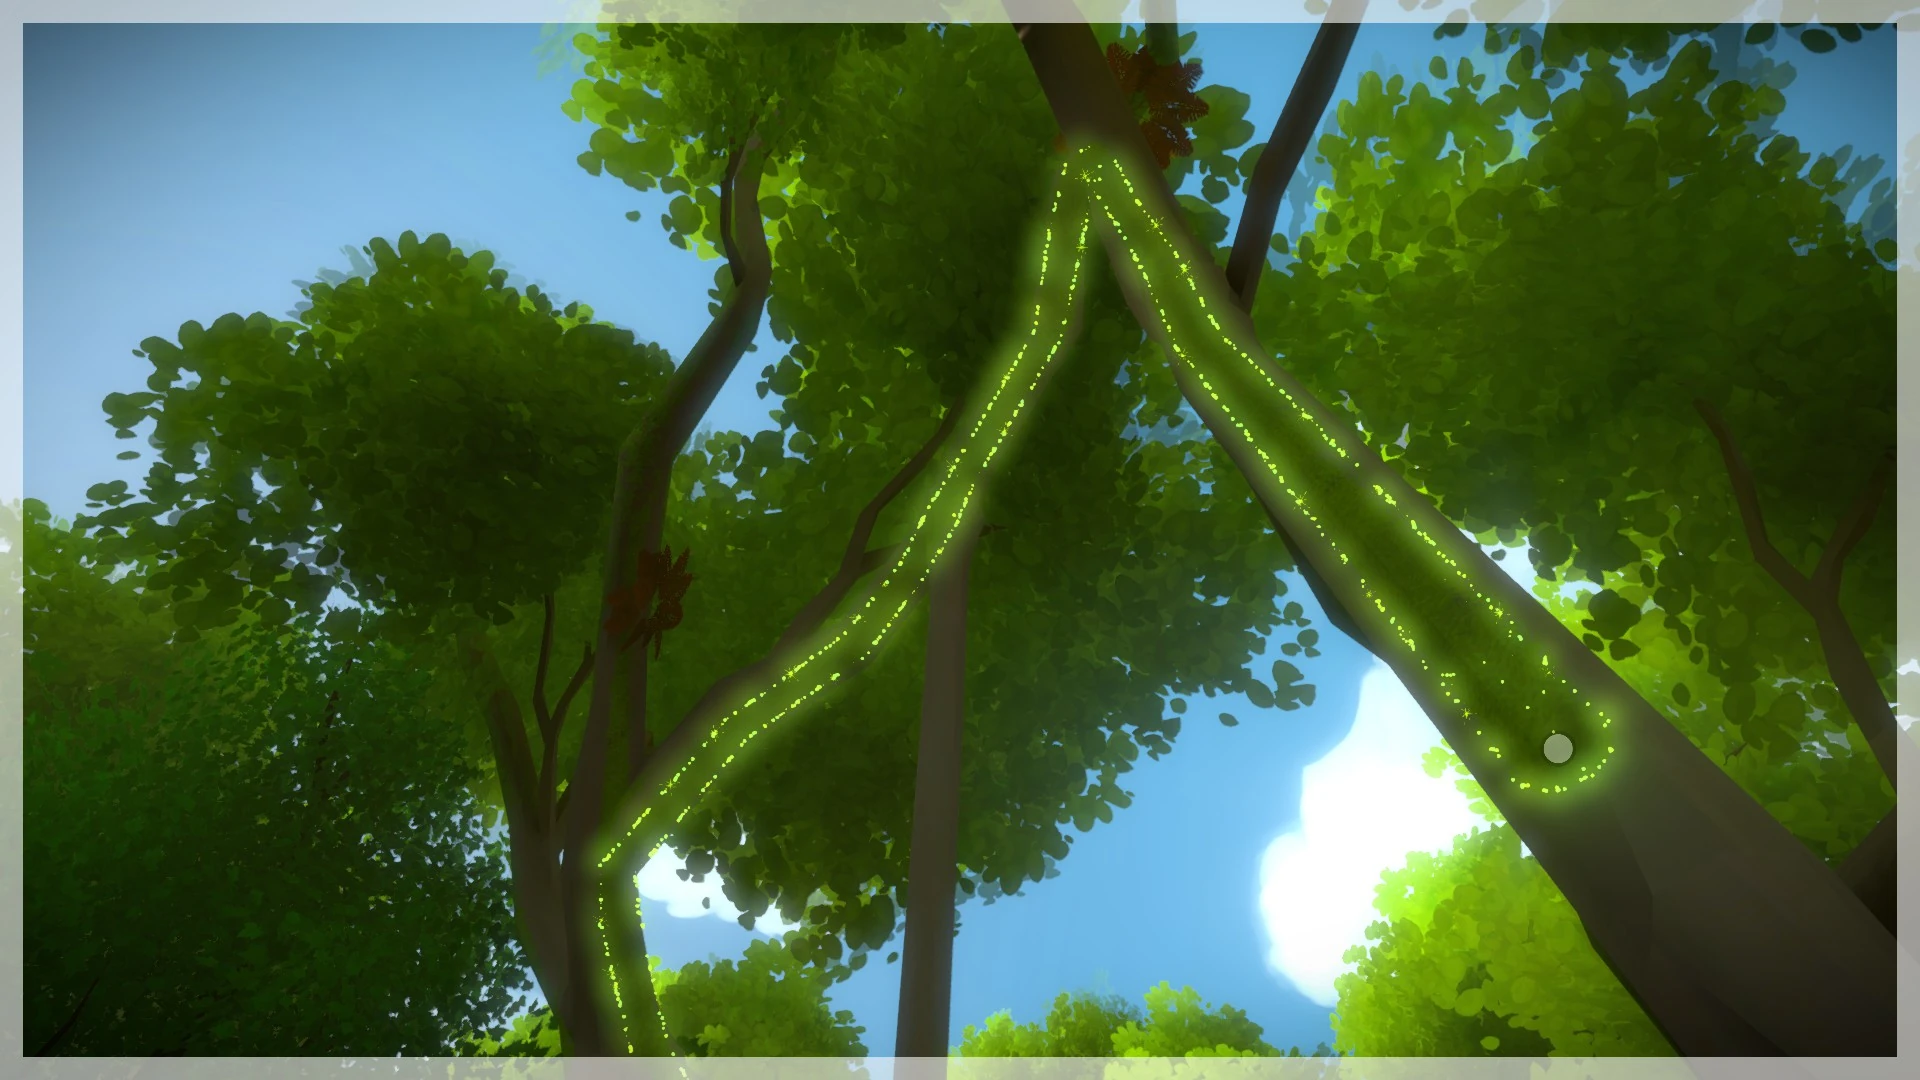
As you enter the Jungle (the path from the Monastery that would take you to the Monastery obelisk), keep your head up. This riddle is hidden in the trees and can be revealed with proper positioning.
Symbol 2[ | ]
From the jungle's central grove, step onto the rocks (same location as Side 1, Symbol 4). Look towards the ocean, and a bit toward the greenhouse to find a large tree.
The large tree from the first symbol forms the center for this pattern. Align yourself to separate an unbroken line of sky from the central tree and the other leaves around it.