 | ||||
|
| ||||
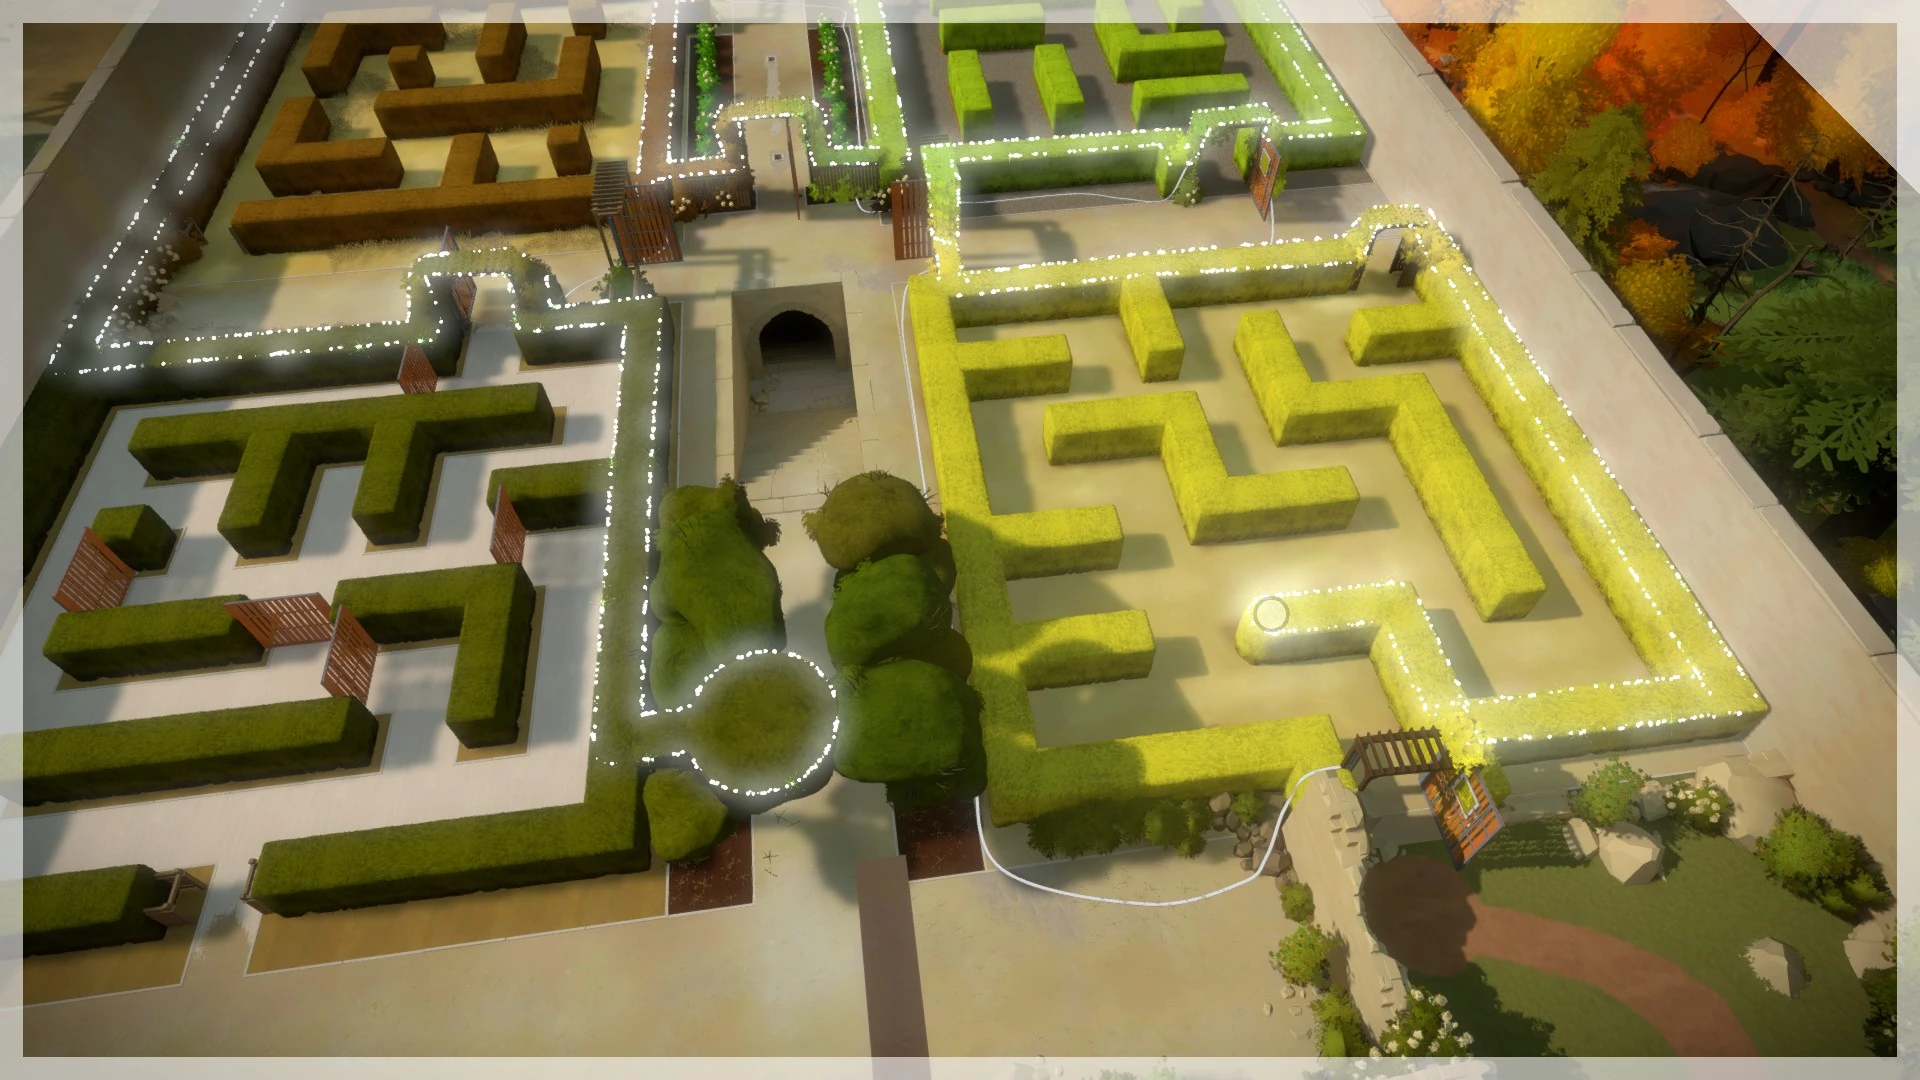
The Keep is a puzzle area in The Witness.
Scroll for complete maze solutions -- but check out these spoiler-free progressive hints first. You may get the hint that helps you figure out how to solve them on your own.
Keep Hints[ | ]
Hedge Maze Hints[ | ]
- Hint 1: Hedge Maze 1: What path did you actually take to get to the exit? The gates in the maze are not drawn on the panel.
- Hint 2: Hedge Maze 2: The hedges have changed after the puzzle was created. Look for hints in the maze where the hedge formation was different before.
- Hint 3: Hedge Maze 3: This hedge maze was also changed after the puzzle was created. But the locations where the hedges connected aren't visible to the eye. But maybe you can employ another sense? (Turn up the volume.)
- Hint 4: Hedge Maze 4: The puzzle destroyer has made sure there are no visual and audio clues this time. But clearly, the maze and the maze on the panel don't match up. Get some paper out and combine the two. You'll see the right (and only possible) path.
- Hint 5: After finishing the hedges: The oversized paths can form environmental puzzles, too. Remember, you can see them in their entirety from the tower.
Life-size puzzles Hints[ | ]
- Hint 1: Life-size puzzles 1: If you can't input the answer to the puzzle directly, try to do something with all the nearby platforms on the ground.
- Hint 2: Life-size puzzles 2: Is the most obvious answer blocked? Try an answer that bypasses the obstacle.
- Hint 3: Life-size puzzles 3: You don't need to walk around the right answer in one go. As long as the right tiles are lighted, it doesn't matter if you made a detour to walk over them.
- Hint 4: After finishing the puzzles: The glowing paths can form environmental puzzles, too. Remember, you can see them in their entirety from the tower. In many cases, however, you may have to redo the puzzles so that the paths from the tower's perspective are not blocked by obstacles.
Keep Solutions[ | ]
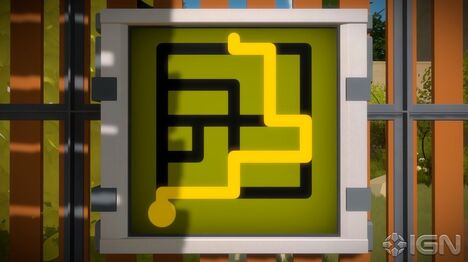
Hedge Maze Solutions[ | ]
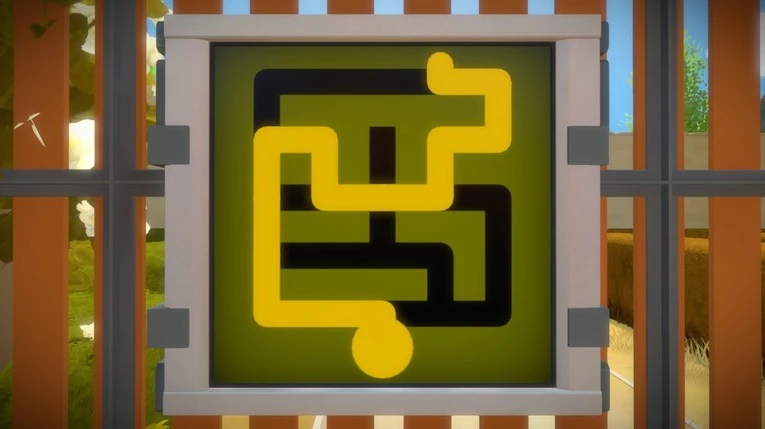
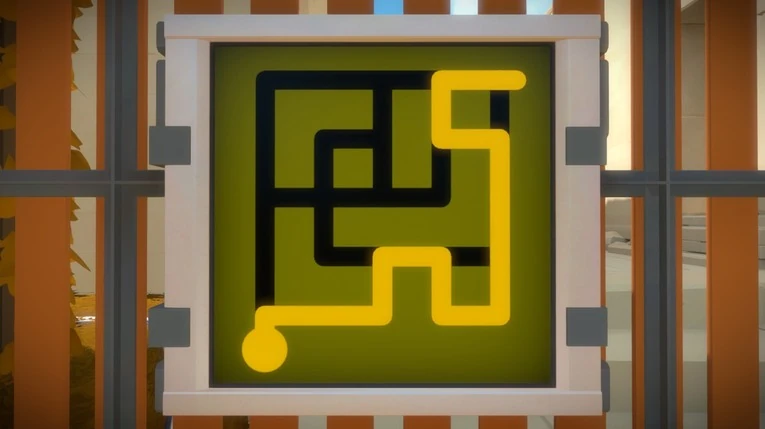

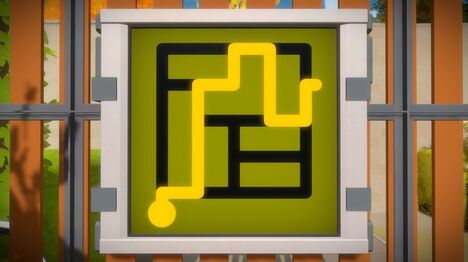

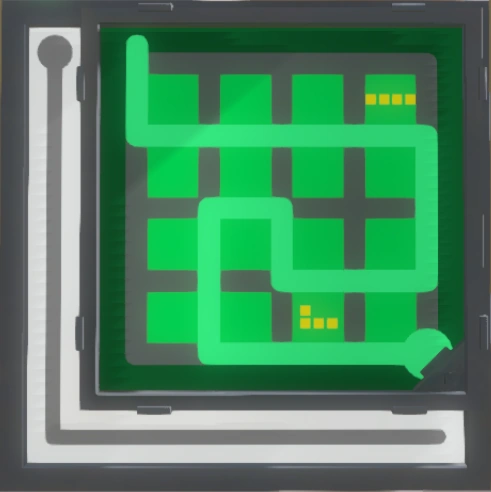
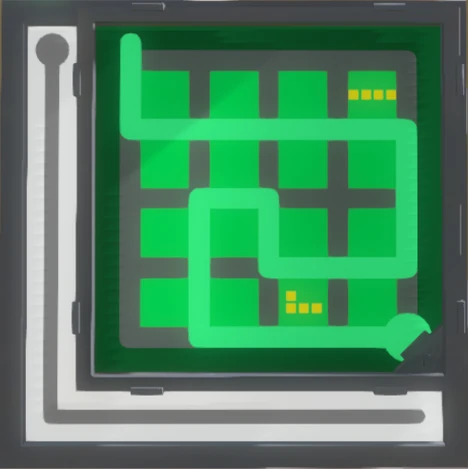
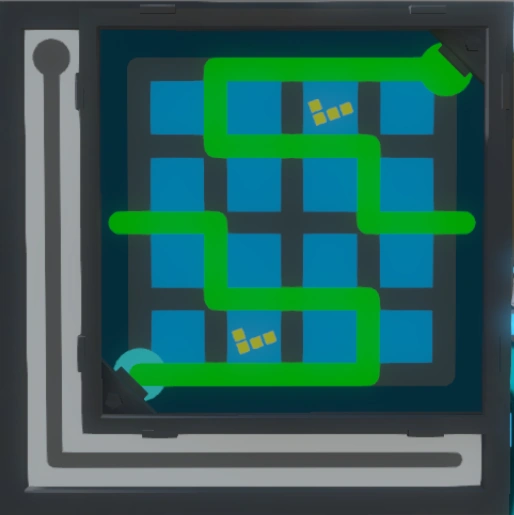
Life-size puzzles Solutions
[ | ]

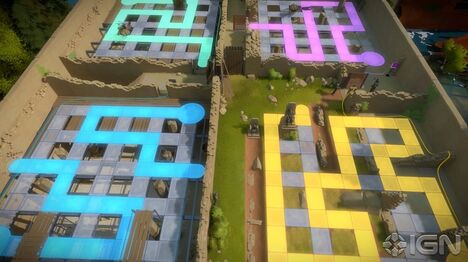
In the second set of mazes, there's no way to input the answer into the panels. You must walk on the nearby platforms, starting from the large circular platform - any tile sou step on will light the respective section of the panel, allowing you to input the answer. If you somehow mess up, you can use the panel to reset all the tiles.
The first puzzle is quite straightforward, being just as simple puzzle with hexagon dots.
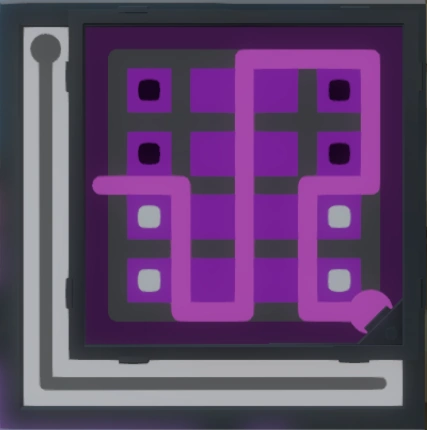
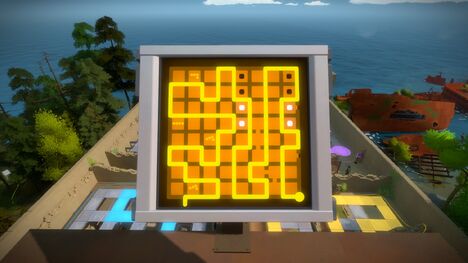
The second puzzle involves black and white squares. The tricky part is that there's a broken platform that prevents you from walking there, thus blocking the simplest answer. The right answer is one that avoids the broken platform.
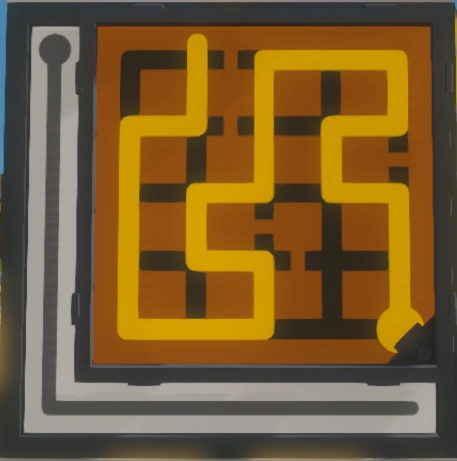
The third puzzle involves tetris figures. The tricky part here is that there are some planks blocking a tile along the path. You must step on it so that the tile lights up, and make a detour to the other side of the obstruction (use wooden platforms to avoid stepping on puzzle platforms and mess up the puzzle, and make sure a path past the obstruction is light up. Once the right tiles are glowing, continue your path as normally.

The final puzzle is quite straightforward too. It's a symmetry puzzle with tetris figures, without additional difficulties.
Activating the laser[ | ]
You only need to complete one side of the Keep to active its laser. The key to both of them is combining the answers to the four puzzles you've solved to form an answer to the panel that's facing them.

